
Smooth Voxels Manual
To table of contents ▼
Click
here
to start
here
to start
Smooth Voxels 2.2.0
by Samuel van Egmond
Are you a developer and not a 3D designer with crazy (or any) Blender skills? But you would still like to create your own 3D models, for instance for a great little WebXR game? Then Smooth Voxels is for you!
Smooth Voxels allows you to turn voxel models into low poly style or smooth organic looking models, even mixing styles in one model.
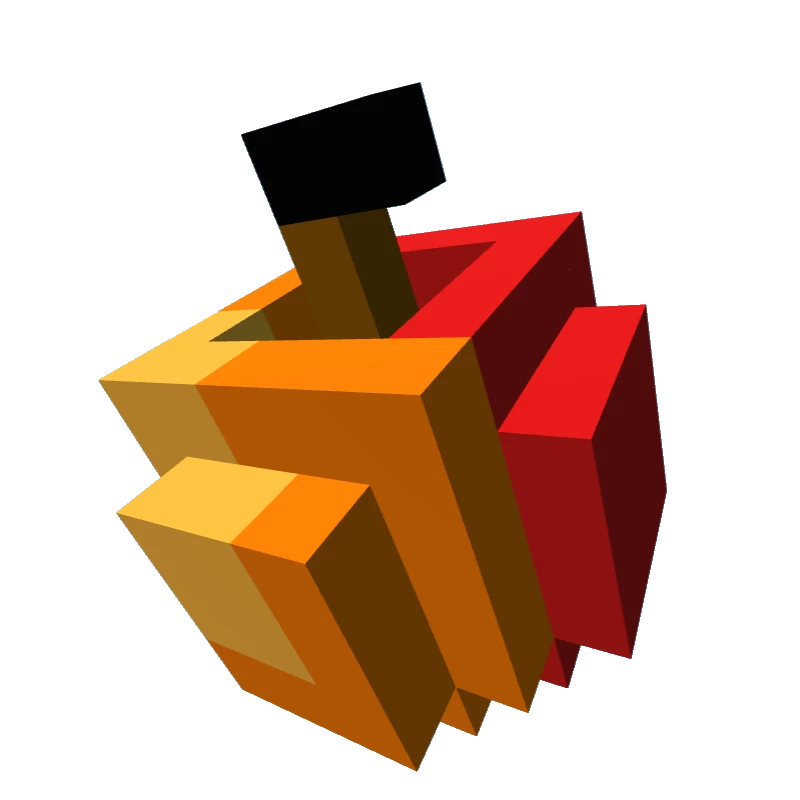
Smooth Voxels uses vertex averaging to produce a much smoother appearance than for instance marching cubes, as seen in the 7x7x7(!) voxel apple to the right.
Smooth Voxel models can be created in the Smooth Voxel Playground and exported to .glTF or .glb, or generated at runtime using the Open Source Library.
Are you a developer and not a 3D designer with crazy (or any) Blender skills? But you would still like to create your own 3D models, for instance for a great little WebXR game? Then Smooth Voxels is for you!
Smooth Voxels allows you to turn voxel models into low poly style or smooth organic looking models, even mixing styles in one model.
Smooth Voxels uses vertex averaging to produce a much smoother appearance than for instance marching cubes, as seen in the 7x7x7(!) voxel apple to the right.
Smooth Voxel models can be created in the Smooth Voxel Playground and exported to .glTF or .glb, or generated at runtime using the Open Source Library.
 All these models are generated from voxels!
Using Smooth Voxels
You can easily create or generate models in the Playground or using MagicaVoxel.Want to use your Smooth Voxel models in a WebXR project or a 3D scene or game? Just export them as .gltf or .glb file for direct use in A-frame, Three.js, Babylon.js, PlayCanvas, Unity or Blender.

All models in the Playground may not be sold, distributed, uploaded (e.g. to SketchFab) or turned into NFT's.
All models in the Playground are free to use in your projects without or (preferably) with attribution.
You are of course allowed to create your own models in the Playground to distribute, upload or turn into an NFT.
Contact me if you want to know what you can and can't do, or to let me know how you are using your or my models.
The Smooth Voxel A-Frame Component
 The Smooth Voxels A-Frame component is fast enough to use in small scenes, however, especially with complex models and ambient occlusion, exporting a .glft or .glb model or exporting as javascript A-Frame component will probably be faster in your scenes.
You'll have to try out what works for your situation.
The Smooth Voxels A-Frame component is fast enough to use in small scenes, however, especially with complex models and ambient occlusion, exporting a .glft or .glb model or exporting as javascript A-Frame component will probably be faster in your scenes.
You'll have to try out what works for your situation.
For a full example, using Smooth Voxels .glb models for objects, rooms and hallways, visit infinitemuseum.glitch.me.
The simple text based model syntax makes Smooth Voxels one of the easiest ways to procedurally generate 3D models! See the Getting Started with Procedural Generation chapter for more information.
Where to start
To table of contents ▼
Creating
Edit models
on the
Smooth Voxel
Playground
on the
Smooth Voxel
Playground
Create
models
using
MagicaVoxel
models
using
MagicaVoxel
Test and view
models on Quest
using
SmoothShare
models on Quest
using
SmoothShare
About this document
This documentation contains a full description of the different Smooth Voxels Component features. Press the 'Try it' buttons and play around with the numbers in the examples to better understand their effects.
You can browse the documentation on your desktop, but also in VR, all samples, and the Playground, work in the Oculus Browser on Meta Quest (2) and Oculus Go.
At the end of this documentation you will find an explanation of the model syntax and compression description. But mostly you'll need a quick reference so use the Cheat sheet and use the code completion in the Playground.
If you want to read this documentation offline, it prints well to PDF.
To print, use standard margings, print background images and scale 100%.
Table of Contents
To top ▲Smooth Voxel Playground
To table of contents▲ If you just want to explore and see some examples, head over to the Smooth Voxel Playground!
The playground shows after every render how many materials and how many faces (triangles) were created. For best performance when using models in a game or scene, reducing materials to a minimum (preferably 1) is most important, but reducing face count also helps. Always try to use the smallest model size and fill all interiors (more voxels, but less faces).
The Smooth Voxel Playground allows you to load and save Smooth Voxel Models and convert images into Smooth Voxel models. It works in any WebXR enabled browser, even in your VR Headset.In a VR headset, you can view the models in full 3D by going to the VR view. Using the two thum buttons you can fly around or through your model.
On mobile you can try out the AR view to see your models in your environment.
Importing MagicaVoxel
The Smooth Voxel Playground also allows you to convert MagicaVoxel .vox models. Everytime you reload your model you keep the SVOX model and material settings which are linked to the palette indexes in your .vox model. The palette index is stored with the color id, e.g. A(123):#0088FF. That way you can edit your model in MagicaVoxel, reloading in the playground to see the result without losing your materials. To start without model and material settings, just clear the editor before loading a new .vox model.
Exporting
Another great option is to export you model to .gltf or .glb files, which gives you an immediately usable model for use in WebXR and other 3D environments.
Note that the .gltf and .glb file format does not allow for some of the material types and options for some material types:
Eventhough side = back is not supported by .gltf and .glb materials, Smooth Voxels reverses the faces in its models to give the same result.
When needed, materials can of course be recreated and added in your target environment.
- Only material types standard and basic are fully supported.
- Material types matcap and normal will produce an error when exporting to .gltf or .glb.
- Wireframe is not supported but can be replaced with a transparent texture for a similar effect using transparent = true, side = double, alphatest = 0.0001.
Note that the A-Frame javascript export options in the playground do support all material types!
Model creation using MagicaVoxel
To table of contents▲ Smooth Voxel models can be created manually or procedurally generated, but often you might want to create a complexer model which is much easier to do using MagicaVoxel. This tutorial describes how to edit Smooth Voxel models using MagicaVoxel, explaining the basics of Smooth Voxels as we go.
This tutorial is not about MagicaVoxel editing, you can find many MagicaVoxel tutorials online, for instance on megavoxels.com.
Load a MagicaVoxel .vox model
- Make sure you have downloaded and installed the latest version of MagicaVoxel at ephtracy.github.io.
- To follow along, download this MagicaVoxel model of a police car.
- Open the Smooth Voxel Playground.
- Clear all text from the editor.
- Press '(Re)load MagicaVoxel VOX file' from the menu.
- Load the PoliceCar.vox.
It's alll about materials
In Smooth Voxels most things are done by changing materials.
One of the lines looks like this:
material colors = F(251):#777777 B(246):#EEEEEE C(253):#444444 A(158):#3399CC E(250):#888888 . . .Let's change the material to see what happens.
- Split that one line into two lines:
material colors = F(251):#777777 B(246):#EEEEEE C(253):#444444 A(158):#3399CC E(250):#888888 . . .
- Replace that one 'material' line by one of the examples below and see the changes on the right:
material deform = 2
material deform = 2, lighting = smooth
material deform = 2, lighting = smooth, roughness = 0, metalness = 0.6
Clamping the sides
- Perhaps you don't want everything smooth, so how about flat sides:
material deform = 2, lighting = both, roughness = 0, metalness = 0.6, clamp = zNote the clamp = z combined with lighting = both because you now have both flat and smooth sides.
- See how your model changes if you change that 'clamp z' to one of the following:
clamp = x
clamp = y
flatten = y z
More can be done with more materials
Now of course, often you want some parts of your model smooth and other parts flat.
You can do that by making more materials and choosing which voxels fall under that material.
- Let's start again to create multiple materials. Make the material line empty apart for 'material'.
- Your model now looks blocky again as it was when you first loaded it.
- Look in the voxels 'ascii art' part at the bottom, with all the layers of voxels. There you can find which voxel letters are used in the police car.
- The voxel id's for the different parts are as follows (change if yours are different!):
A + B --> Car body
C + E --> Wheels
F     --> Front and back bumpers
- So let's split the police car material into four materials by replacing the material with the materials below.
- Change the voxel Id's (A, B, C, etc.) if the letters are different in your model.
- Then one by one uncomment the material lines (i.e. remove the // after 'material') and see the changes.
- Then one by one uncomment the material lines (i.e. remove the // after 'material') and see the changes.
// Car body
material // lighting = both, deform = 1, roughness = 0, metalness = 0.5 // , clamp = z -y
  colors = B(246):#EEEEEE A(158):#3399CC

// Wheels
material // deform = 5, clamp = z
  colors = C(253):#444444 E(250):#888888

// Bumpers
material // lighting = both, deform = 1, clamp = y
  colors = F(251):#777777

// Other stuff
material
  colors = H(11):#FFCC33 D(254):#222222 G(219):#AA0000 I(248):#BBBBBB K(249):#AAAAAA J(206):#0033CC
When you have uncommented all lines, see how the car body is flat at the sides and the bottom? That is because of clamp for the sides (z) and the bottom (-y).
Good, that looks kinda Ok. Well, except for the wheels, the tops could be a bit more, well roundish...?
The Wheels on the Police Care Go Round and Round
You can separate out a group of voxels so these voxels are no longer attached to the rest of the model.
It's like you have two separate models in one file.
- Create a group for the wheels by changing the material to:
// Wheels
group id = Wheels, translation = 0 0 0
material deform = 5, clamp = z, group = Wheels
  colors = C(253):#444444 E(250):#888888
So now the wheels look round (because of the deform), but why did the car drop to the ground?
Actually sort of logically, since the wheels are no longer part of the main model, the main model (the car) is now on the ground.
We can fix that by moving the model up.
- All the way at the top in the editor is the word 'model', change that to:
model
position = 0 0.04 0
Round trip editting But once you have made some changes to the model in the Smooth Voxels Playground you may want to change some things in MagicaVxoel. For that you need round trip editting:
- Load the PoliceCar.vox in MagicaVoxel.
- Edit the model, for instance copy the lights on top.
- Save the model (just overwrite the PoliceCar.vox file).
- Do NOT clear the Smooth Voxel Playground editor. Leave all changes, round wheels and all.
- In the Smooth Voxel Playground, press '(Re)load MagicaVoxel VOX file' from the menu.
- Now you see the changes in the model on the right.
Note that you can also save as MagicaVoxel .vox file from the Smooth Voxel Playground.
However, .vox files do not store the Smooth Voxel materials, so you must also save the .svox file!
You must always load the Smooth Voxel .svox file first and reload the .vox file second to keep the materials!
Now you understand the basics, it should also be easier to understand the other examples in the playground.
However, .vox files do not store the Smooth Voxel materials, so you must also save the .svox file!
You must always load the Smooth Voxel .svox file first and reload the .vox file second to keep the materials!
If you want to learn more, just continue in the next 'Model basics' chapter and the chapters after that.
For a quick reminder of all options see the cheat sheet: smoothvoxels.glitch.me/cheatsheet.html.
Model basics
To table of contents▲
This whole document is a tutorial.
Most chapters have an example with a round 'Try it out' button.
Play around with all options as you go through to learn all the ins and outs of Smooth Voxels!
Let's start with an simple example of a model showing most of the features of the Smooth Voxels component.
TryMost chapters have an example with a round 'Try it out' button.
Play around with all options as you go through to learn all the ins and outs of Smooth Voxels!
it
model
size = 5 2 5        // Size X * Y * Z Voxels
scale = 0.2         // Uniform scale, X Y Z is also supported
origin = -y         // The origin is at center bottom
rotation = 0 225 0  // Rotate the vertices
position = 0 0.1 0  // Reposition the vertices (in world scale)
resize = fit        // Resize the model to original size after deform, warp or scatter

wireframe = false   // Wireframe can be set globally or on a material

// Add ambient occlusion for extra realism
ao = 5 1

// The red material uses the default flat lighted voxel material
material
  colors = A:#CC0000 // Colors can be #RRGGBB or #RGB

// The green material is transparent
material lighting = flat, opacity = 0.5
  colors = B:#0C0

// The blue material is deformed and metallic
material lighting = smooth, roughness = 0.3, metalness = 1, deform = 1
  colors = C:#00C

// The yellow material is deformed and clamped
// For clamping use a material both flat and smooth
material lighting = both, roughness = 0.2, deform = 1, clamp = -z -x +y
  colors = D:#CC0

// The voxels are represented in X Y Z order
// I.e. from left to right you see the (two) horizontal voxel layers
voxels =
-D-C- -----
DD-CC -D-C-
----- -----
AA-BB -A-B-
-A-B- -----
The model has the following properties, of which only 'size' is mandatory:
General
- size specifies the size of the model in voxels size = <x> <y> <z>. If the model is a cube only one number is needed.
- shape changes the model outline from box, to sphere or cylinder. See the chapter on shapes for more information.
- wireframe, when true, generate all faces as wireframe, even when a material explicitly sets no wireframe.
Note that setting wireframe globally is meant for debugging and does not change how internal faces are generated (e.g. a solid face next to a transparent voxel), but setting all material to wireframe removes all internal faces. The end result could therefore be different. - ao determines the ambient occlusion settings. See the chapter on Ambient Occlusion for more information.
- aosides determines from which sides the ambient light is occluded. See the chapter on Ambient Occlusion for more information.
- aosamples determines the number of samples taken to calculate the ambient occlusion (default 50 samples, optimized for speed). See the chapter on Ambient Occlusion for more information.
- scale specifies the scale of the voxels scale = <x> <y> <z>. To fit the entire model in a 1 unit cube, the scale should be 1 / max. size.
- resize has three possible values.
resize = fit resizes the model so it's fits within the original bounding box regardless of deform, warp and scatter.
resize = fill resizes the model so it's fills the original bounding box, scaling with different values for x, y and z.
resize = bounds resizes the bounds so they fit around the model after deform, warp and scatter, ignoring empty voxels.
When resize is not set empty voxels are kept so a model with empty voxels below it with origin -y will 'float' above ground level.
Note that resize fit and fill do not move the model. Asymmetrical models may therefore protrude from their original bounding box when resize fit or fill is used. - autoresize is deprecated, use resize instead.
- origin defines which point will be positioned at (0,0,0) when no position is specified.
The origin is also the point around which the rotation is performed.
The origin of the model is defined as planar definitions but can only specify one x, y and z plane. E.g origin = -y is equivalent to origin = x -y z and places the origin in the center of the bottom of the bounding box.
The default origin is the center of the bounding box around all voxels.
- rotation specifies how the model is rotated around the origin.
- position specifies where the origin is moved in world scale.
Scale, origin, rotation and position are not 'virtual' transformations but actual transformations that will be performed on the final model.
This can be useful when combining multiple models or when you want the 'front' of the model to be one of the corners.
Planar actions
-
Planar actions define the planes for which they are active.
See planar definitions for more information.
- flatten is used to flatten one or more sides of the model. See the chapter on flatten and clamp for more information.
- clamp is used to flatten one or more sides of the model with perpendicular edges. See the chapter on flatten and clamp for more information.
- skip will completeley discard the faces, which increases calculating as well as runtime performance. See the chapter on skip and hide for more information.
- hide prevents the face from being generated into the final mesh, but they are created, influencing nearby faces, allowing for shells, etc. See the chapter on skip and hide for more information.
- tile, prevents the edges of the model to warp or scatter. Use tile when tiling models to reduce obvious edges.
-
When using SmoothVoxel models with custom shaders you can add extra vertex data to the voxel vertices.
See the shaders chapter for more information.
-
data must be defined in the model to set the defaults for the attributes.
To change the data for a material you must exactly match the names and order of the model, changing only the values.
- simplify should be turned off when using custom shaders that move vertices in different amounts (e.g. using a sine over x, y or z).
Materials
To table of contents▲ Materials allow for standard properties such as roughness, metalness, opacity, or emission, but they also specify how the voxel vertices need to be deformed, scattered, etc. to turn voxels into smooth organic or low poly models. By using different materials in one model, these different styles can be mixed.Per material one or more colors must be defined. By setting the voxels to different colors, the voxels also get the respective materials for these colors.
A material has the following properties, of which only ''colors' is mandatory:
Lighting
- The possible values for lighting are:
- flat makes the triangle faces look flat.
- quad makes the quad faces look flat
- smooth makes the faces look smooth (often combined with roughness < 0.5)
- both makes the faces look smooth, but flattened and clamped sides look flat.
- sides makes faces look smooth when they are at the same voxel side, with hard edges between sides.
- roughness is a value between 0 and 1, where smaller means more shiny and higher more rough.
- metalness is a value between 0 and 1, where higher, the more metallic the material appears (typically combined with roughness < 1).
- opacity is a value between 0 and 1, where smaller means more transparent and higher more opaque.
- emissive specifies that the material emits light of a certain color and intensity (optional, default intensity 1). E.g. emissive = #FF0, emissiveintensity = 0.5. Combine with fog = false for glowing objects in a dark fog.
- fade lets the colors fade between voxels of different colors. See the chapter on fade for more information.
- wireframe = true, renders the material faces as wireframe,
- fog = false, makes the material no be affected by fog,
- side can be front, back or double to specify which side of the faces needs to be rendered.
- deform is used to smooth the material or make it more spikey. See the chapter on deform.
- warp makes the material warp in all directions. See the chapter on warp.
- scatter makes the vertices move in random directions and distances. See the chapter on scatter.
-
Planar actions define the planes for which they are active.
See planar definitions for more information.
- flatten is used to flatten one or more sides of this material. See the chapter on flatten and clamp for more information.
- clamp is used to flatten one or more sides of this material with perpendicular edges. See the chapter on flatten and clamp for more information.
- skip will completeley discard the faces, which increases calculating as well as runtime performance. See the chapter on skip and hide for more information.
- hide prevents the face from being generated into the final mesh, but they are created, influencing nearby faces, allowing for shells, etc. See the chapter on skip and hide for more information.
- data can be defined per material. See the shaders chapter for more information.
- simplify can be defined per material. See the shaders chapter for more information.
it
model
size = 14 6 14,
scale = 0.0714,
origin = -y

// The red material rough (roughness 1) and non-metallic (metalness 0)
material deform = 3, side = double
  colors = A:#C00

// The green material is more polished and somewhat metallic
material lighting = flat, roughness = 0.5, metalness = 0.5,
         deform = 3, side = double, colors = B:#0C0

// The blue material is highly polished and metallic
material lighting = smooth, roughness = 0.2, metalness = 1,
          deform = 3, side = double,  colors = C:#00C

// The light blue material is semi-transparent
material lighting = smooth, roughness = 0.2, metalness = 1,
         deform = 3, opacity = 0.6, side = double
         colors = D:#0DF

// The magenta material uses wireframe
material lighting = flat, deform = 3, wireframe = true
  colors = E:#C0C

// The orange material is actually red but emits yellow light
// Ignore fog (e.g. in a scene with black fog for darkness)
material lighting = flat, emissive = #FF0, emissiveintensity = 0.5, fog = false,
         deform = 3, side = double
  colors = F:#F00

voxels =
6(------EE------)
6(-----EEEE-----)
6(-FF--EEEE--DD-)
6(FFFF--EE--DDDD)
6(FFFFFEEEEDDDDD)
6(-FFFFEEEEDDDD-)
6(---FFFEEDDD---)
6(---AAABBCCC---)
6(-AAAABBBBCCCC-)
6(AAAAABBBBCCCCC)
6(AAAA--BB--CCCC)
6(-AA--BBBB--CC-)
6(-----BBBB-----)
6(------BB------)
Material Types
To table of contents▲ With the standard material and the many Smooth Voxel options we can create almost any material. However, this material can be slower than other options, especially when used on a mobile device with a less powerful GPU. The same way as that it is important to reduce the number of materials and faces to increase performance of your models, it may also help to use other material types.
If you are going for performance, try to stick to material type basic with Smooth Voxel lights and ao, especially when targeting mobile (or Meta Quest).
Always test in your target platform and target devices to see what gives the best results.
The actual performance not only depends on the type of the material, but for instance also on the amount and size of textures used.
Smooth Voxels supports the following material types (in order of performance, faster rendering in your scene to slower):
- basic is the most performant material, but it gets that performance by ignoring all lights.
However, using Smooth Voxel (baked) lights and ambient occlusion you can still produce light and shadows in you model, often giving both great lighting and performance!
This material uses THREE.MeshBasicMaterial. - lambert a better performing material for non shiny surfaces.
This material uses THREE.MeshLambertMaterial. - phong a material for shiny surfaces.
This material uses THREE.MeshPhongMaterial. - standard is the default PBR material which uses roughness and metalness to create a wide range of materials.
This material uses THREE.MeshStandardMaterial. - standard is an extended version of the standard material with extra options for clearcoat or glass that refracts the actual scene behind it instead of the environment map.
This material uses THREE.MeshPhysicalMaterial.
Note that .gltf and .glb export do not support reflectivity. Try to export and import in your target environment to see what works and what does not.
Smooth Voxels also supports the following material types for 'special effects':
- toon a material that looks like a cartoon. It ignores roughness and metalness.
This material uses THREE.MeshToonMaterial. - matcap a material that uses a spherical 'material capture' texture to mimic a specific material by reflecting that texture based on the normal of the model.
You must add matcap = <textureid> to add a matcap texture to the material.
Many matcap textures can be found on the internet for instance here.
Because matcap materials use reflection, textures with larger features may look strange when the moving around the model because the surface itself seems to be moving.
This material uses THREE.MeshMatcapMaterial. - normal material that shows the normal for the surface.
This material uses THREE.MeshNormalMaterial.
it
texture id = glass, size = 64 64, cube = false, image = data:image/jpeg;base64,/9j/4AAQSkZJRgABAQAAAQABAAD/2wBDAAIBAQIBAQICAgICAgICAwUDAwMDAwYEBAMFBwYHBwcGBwcICQsJCAgKCAcHCg0KCgsMDAwMBwkODw0MDgsMDAz/2wBDAQICAgMDAwYDAwYMCAcIDAwMDAwMDAwMDAwMDAwMDAwMDAwMDAwMDAwMDAwMDAwMDAwMDAwMDAwMDAwMDAwMDAz/wgARCABAAEADAREAAhEBAxEB/8QAHAAAAgMBAQEBAAAAAAAAAAAABgcDBAUICQAC/8QAHAEAAgMBAQEBAAAAAAAAAAAABQYCBAcDAAEI/9oADAMBAAIQAxAAAADyDF9tT3mYLDw2bGPGrT7Sw5kMWdve4fSoaBJo+V5c5+Yc24KCp099MLZLaULTAz/BQ886YTW935RBYDcEza9NmWjxLlMChWziD4zuVJQMM4QUzY0LR1P96GBvL6iSFfQnttZ2BG/QDKG+Q15ADtrF62Rh6dRVVDfp12hakmuCZBqFjBNnjV4dLtb2yjGOvcZ/MNupFHvewiDfqyAcnMCemypfvT1ZNzPlI4XxAgUYQNqYRpj4VLfb/8QAHxAAAgIDAAMBAQAAAAAAAAAABAUDBgECBwATFAgQ/9oACAEBAAEFAfAVUhnlaqIUpdmLWgOIrLNnXGBDcsFGRf4jSbtcizS7xX2ttaA0kC9/gkPylXh3XrEn0L+UvonPSqGd9OFlH5bEPFrf1MhdjU+6qO7O11utpnk2gy70199o5tpcfxUwLlMr1Os+tbVMrOM9tITpS20u9eFWVql2AqybkVnT6ROxRq+C30HVYPEbvADO31Nj1epGwgUWdx6iw2XxfZGxZDVqd3Xi2GOgcbpSBa/plljLqp2S5dF0bIzKdH6AovllYkticq0NXtZNXJ4J0XRET2Slw2XlU1NWPB/0HAMkqfPqzVk3ObQaFtuSXuTnyCbMOap191XIE/UbErRWO/n27Y0sbG85WZv5/8QAMhAAAgEDAgMGAwgDAAAAAAAAAQIDAAQREiEFEzEUMkFRYXEigaEGECNCUmKR0RUzsf/aAAgBAQAGPwGtXdj86h7dcNaWzMObKIua6DzCZGT6ZHvUy8JuLieyU4jkuIlikb1IUkD2BPvRGVkB23GaIdQhNM8bc2IbZ/SfI/dJJ3YLddcj+QrlpF8OcgY6UeG8VRba95aSNGsyy6AyhhnSSM4I26jxrY0msFkzuK4SnDfs9/ib6yg5N5PDcyOL9vCTS+dDeeDg+QrLEtH3X/ctQc1dVtfQJdW0o7ssTrqVh7g1dcPRNEp5c0rY3OdWF+gPzqa4v7CLiwZVCrK7Lo9Rpx6daMsVrDaRXJCQQRsW6e+/WrS7uLGK4FpMk3Z7qMmGfDZ0MNsqcYIz0riHFI+GWfC4J5Ob2SxQpBbZ6KoJJxTGJi6jw8RVz2eZZ1UsqOFKiQDocHffrg19mOJc9J5LK0eeCTTlhiblSW5P7Gwd/B6nExU6boouB0RegpzLaJdRbH/YUbJ6VwqflXNvFauWZQQ+f5rQbuLJ/JPGV/sVNJax22JviLQMrBgM+VcUtppXvhcwoJDcfiHEfwpgncaRgDHQbdKdbkmOEv3U6/Kr37MzQ9nmmkt50VBhUlCdnnXrsG5SOR4sakdPhjmmZ8e6g/XNRsvgg/qoGWBdSQ6Ty9RKkbZO53OM/PwqZlaeC8AARe9zW8STtjfyzUsbM3LeB2xnboauOTNyJZNSg+fQ1Ik9wjpuztpIxsM4ppbSaJhbOkjcxsagC5Pzwuce1OoSI3vDManz+IwHTb12HpiuZeX03DpS2mKUw8yDPXDEbqc5pIxyN5NJljxJHJk9Qeh/7TR9ngVs51ooVjUz5lAhjbG1Xc9wzB1jCwpsdbk/0Ou/h50w18oPu3oKghilK5PMYZ3O2B9Cf5qRoSCkyGORD0dT1FXfCpbhrGK+bVBMqK+lv0ENtpPv41edltYoZ4NN6q9n5RLL3iR7Zq34va2Nmi8TtVk2wDuNXTT9a4fw2Fo4GmYLInewnxHbbzY9d6u+McZmgeeadjY25Ya5MAqDjGrGotnfHwikFlCDyMDP5fc/OviYtj6/d4EUbe34rdJbMNJhkbXHv6HI+lQWdnxe1FrbZESnRlATnG658aVONXb3kcRyqqQBR0qUUdF1ajRHRfL7v//EACMQAQEAAwADAAICAwEAAAAAAAERACExQVFhcYEQkaHB0fD/2gAIAQEAAT8QwSj2Pn695Hwj22xMuIl6Mn3m0zq2LdGE2xWgqCU9bLnMSUo34/8Ae+zJNKEeoWHh/wAPSm/4emw8Yv8Aa6PrgTZiKaCG3c3+HrvKjRBj2iN8migEQW3Y4WpiXlLlc0DnS80Bm26xlUgF1R6nzvzc8OH+5LopT0JjEaII4AEJOTts0gVedXmAEHvwPXskaPzDDRPiIgtpV751hbIQGEhq0QCpBMWdVFJQML4V8yHEItXwMeti7CAgAEACWJTEOO5LMQdlakgxYKHMS1E7+8DXK3WMCCQBwCsJrZqQXYPjEHKGX+LMQUEDwDrep9DuWPE3y+uzWIggDLDjH7rErWcrubxcoRvDR8CiXOKo2wmv6HE4XeQoyr5PF6ObEcYGDaBCng4OCN4Pypv9EOgihvbkbCqcPecsMF4z0ewfZcR3AYGdg7QU0G981gb0KkBmpt0TsVTBVq7aanwa3GxvgtgkYvgVTA8QdMxeyiuAGjaDvUcd4X2ipgdIgx8dx40eWQRAWbFPp3CHhWwFR2IDUELXGCX4CVB2/nR57rLWlHs9foNH49YC4L6REPxxNjEiDhreSlWRUikREKgMFhjZj7E9/NwKdu6CCBA+6tw1kGXYDUAUNC5Ms44eJNAe+sUNFFLACeKv0qv2Hown9g+Xl/hSz0n/ANrErnRkCJyJ/TLMfm3HkIKCrCBAzeWoFcpADx4c97hf+50fkMeDc/t+f4//xAAqEQABBAEDAwMDBQAAAAAAAAABAAIDBBEFEiEGMUETImEHIzIUQnGBof/aAAgBAgEBPwAsyU9wYFNqmw7WKGSR43L0mE5KJLW+xRvMgTOTypZtqntZUMEbjuTXcbWqy1pblqilka7BVbAaPlXaZicMeU6xG+fg8BdYW7Be1lOT08d/OV0xqY/S4sP3Pb3Kh1CGzzG7GFassYNgPu8Jpa4c8FVCWxgFTvE1QkdwqFRgdJM1anoLrYBEmC74VbRJ6lKWJjtznYwnUdWgcZGtIH8rQdRtTWgLJOGrX2Na+GePgjstI1Bpw6RPuFzyyPsVS1Fk++NvBTZmMDD+4J9iE8huVaGPYGqtVh2P29+FbjidC0ychafCDHhgwFpcLZpCY3fipfU0zXg5x+29azqViK9siZu/vC0qaC5HtzyPC9dgl4KM0IsNY13JV/c8shi7efhRTtir7RyF0/LMLEhHAK1rQ4rzASMEdl15056rW2g3cWDkZIz88Lo7XLVTWxDZJ2HI7+CrOtXqth9OeU5Yey+m7p7l19iYl2Oy6iuarPqLalDgD8nf6FoFe07myqFOKEEM8oYaMDsrFZj2ELVuiqFiXe6IceRwtQ6L0izZdPNF7j3OStH6drUMyUWYz3VbS3y/cf5UFWOJoDUT7sr/xAAqEQABAwMEAQMDBQAAAAAAAAABAgMEAAURBhIhMSIHE0EUUXEVIzKRwf/aAAgBAwEBPwDHOadcAFLuTZO0UhskbhSrYhS9+KKnGT4c1GlB/wAV0rjwFAYTUmThWM1HhMrO4UgDbtTTyFhvcmvqHRwoYpaCn9xFRH94zT8hCWlJQc1ri4SVOpTBe9sjv5rRd42wdshe9Se1VEujD6cskVOmNtoSgnlVKUjIDvBpQSEe0fioQLMnBPBp9htr3HGed1M6R/U5W9xWAaj6Kdt9vfaaVlSsYpWmtQxyHUAkfmrRIuQuLbc3jHVataK32ZSe09U5IUmKFio9z3K47pmYl9tTaD18VZ32m8oVXmppRznFfUpX4JPVTIyBJbWs81NMZTYLw6qS+FxlNsj8VaWCZIBFSUSrVfTuVlDnQq86nuVtuCmYje8fIyB/We607q5UqOpAV5Ui+sORs7hu+9OX1b8xtrdkirm24+42gDg91KQ1FinaORWmlOvyVuEd1eLIxcEhD45T816uenJmNIuDCN/tg5AJGft1WhJ9wt+oAiYpQbIIxzwMGl3W7wZDkKQ8fE9fmvRGE/PurkySMhOMGtSLu9wviIFvJShH8jUS3zCT7pzmocBMRAS3W8BPl3Q27fMbhUrQVinv+6+wM1P9G9OzpSpqm8qV/lad0barI4VxUYBpZZVlbCcH5pDQQBuPNYKScdGv/9k=

model
size = 14 6 14
scale = 0.0714
origin = -y
rotation = 0 180 0
wireframe = false

// The red material is a phong material
material type = phong, lighting = smooth, deform = 3
  colors = A:#800

// The clear material is a physical refractive, reflective material
material type = physical, lighting = both, deform = 5, roughness = 0, metalness = 0.2, thickness = 1, transmission = 1, ior = 1.5, opacity = 1
  colors = B:#FFF

// The blue material is a basic material (unaffected by scene lights, affected by Smooth Voxel lights)
material type = basic, lighting = smooth, deform = 3
  colors = C:#00C

// The light blue material is a toon material
material type = toon, lighting = smooth, deform = 3
  colors = D:#48C

// The glass material is a matcap material using a glass matcap
material type = matcap, matcap = glass, lighting = smooth, deform = 3
  colors = E:#FFF

// The multi colored material is a normal material showing the surface normals
material type = normal, lighting = smooth, deform = 3
  colors = F:#FFF

voxels =
6(------EE------)
6(-----EEEE-----)
6(-FF--EEEE--DD-)
6(FFFF--EE--DDDD)
6(FFFFFEEEEDDDDD)
6(-FFFFEEEEDDDD-)
6(---FFFEEDDD---)
6(---AAABBCCC---)
6(-AAAABBBBCCCC-)
6(AAAAABBBBCCCCC)
6(AAAA--BB--CCCC)
6(-AA--BBBB--CC-)
6(-----BBBB-----)
6(------BB------)
Colors
To table of contents▲ Every material must define one or more colors with IDs. E.g. colors = A:#F00 B:#00FF00 Blue:#0000ffColors must use hexadecimal notation with 3 (#RGB) or 6 (#RRGGBB) hexadecimal digits and must start with a # character.
Each color must have an Id consisting of one uppercase letter, optionally followed by one or more lower case letters [A-Z][a-z]*.
These color Id's are used in the Voxel matrix where empty voxels are shown by means of '-'.
Multiple materials result in multiple draw calls, but multiple colors per material do not, so limit the number of materials to limit the number of draw calls.
Smooth Voxels will combine materials which are the same except for lighting, ao, fade, deform, warp, scatter, flatten, clamp and skip.
Color management
Smooth Voxels will combine materials which are the same except for lighting, ao, fade, deform, warp, scatter, flatten, clamp and skip.
By default Smooth Voxels will create models with colors in the lineair color space instead of SRGB. Lineair color space gives more realistic colors, but darker than SRGB, so you should not mix this in one project. In A-Frame / Three.js this should be combined with colorManagement:true in the scene renderer attribute. You can turn this off in the playground in case your project does not use color management.
When generating models at runtime using the The Smooth Voxels A-Frame component, color management can be turned off by adding SVOX.colorManagement = false; in javascript.
Color clamping
By default Smooth Voxels will not clamp colors, which results in RGB values outside the allowed range. Depending on your target platform this may create better results and interesting effects. You can turn this off in the playground in case your target platform does not handle unclamped colors.
When generating models at runtime using the The Smooth Voxels A-Frame component, color clamping can be turned on by adding SVOX.clampColors = true; in javascript.
Shapes
To table of contents▲ Shapes allow for some interesting effects by deforming the entire model to fit inside a the specified shape. Smooth Voxels allows you to create spheres, cylinders, prisms, pyramids, lathes and more.There are three ways to change the shape of a model:
- shape changes the overall shape of the model.
- scale.. scales the model in a specific direction.
- rotate.. rotates the model in a specific direction.
- translate.. translates the model in a specific direction.
shape
The possible values for shape are:
- box makes the model (outsides) a box (the default).
- sphere makes the model spherical (and therefore works best when x, y and z size are the same).
- cylinderx makes the model a cylinder around the x axis (works best when y and z size are the same).
- cylindery makes the model a cylinder around the y axis (works best when x and z size are the same).
- cylinderz makes the model a cylinder around the z axis (works best when x and y size are the same).
Both scale.., rotate.. and translate.. use a similar syntax:
      scale<axis:x/y/z><over-axis:x/y/z> = <v0> <v1> ... <vN>
      rotate<over-axis:x/y/z> = <v0> <v1> ... <vN>
      translate<axis:x/y/z><over-axis:x/y/z>  = <v0> <v1> ... <vN>
With:
- axis the letter of the axis being scaled or translated. Not for rotate!
- over-axis the letter of the axis along which the scaling, rotation or translation takes place.
- v0 v1 ... vN list of float values used to scale, rotation or translation along the over-axis.
      shape = box, scalexy =  1 0    // Prism: Scale x in the y direction from 1 at the bottom to 0 at the top
      shape = box, scaleyz =  2 0.5  // Trapezoid: Scale y in the z direction from 0.5 at the back to 2 at the front
      shape = box, scalexy =  1 0, scalezy =  1 0    // Piramid: Scale x and z in the y direction from 1 at the bottom to 0 at the top

      shape = box, rotatey = 0 90    // Twist the model from 0 to 90 degrees around the y axis (up).

      shape = box, translatezy  = -1 1  // translate z in the y direction from -1 at the bottom to +1 at the top
      shape = box, translatezx  =  0 1  // translate z in the x direction from  0 at the left to +1 at the right

      shape = cylindery, scalexy = 1 0.1 1 1.1 1, scalezy = 1 0.1 1 1.1 1 // Lathe of a glass
The example below shows the main shapes that can be created using the shape, scale.. and translate.. keywords.
Tryit
model
size = 19 4 19
scale = 0.05263
origin = -y
position = -0.5 0 -0.5

// Box (default)
group id = A, translation = 0 0 0, shape = box
material group = A, roughness = 0, lighting = flat
  colors = A:#C00

// Pyramid
group id = D, translation = 0 0 0, scalexy = 1 0, scalezy = 1 0
material group = D, roughness = 0, lighting = flat, skip = +y
  colors = D:#C00

// Cylinder in y direction
group id = E, translation = 0 0 0, shape = cylindery
material group = E, roughness = 0, lighting = both
  colors = E:#0C0

// Cone
group id = F, translation = 0 0 0, shape = cylindery, scalexy = 1 0, scalezy = 1 0
material group = F, roughness = 0, lighting = both, skip = +y
  colors = F:#0C0

// Lathe
group id = H, translation = 0 0 0, shape = cylindery, scalexy = 1 0.1 1 1.1 1, scalezy = 1 0.1 1 1.1 1
material group = H, roughness = 0, lighting = both
  colors = H:#0C0

// Sphere
group id = I, translation = 0 0 0, shape = sphere
material group = I, roughness = 0, lighting = smooth
  colors = I:#00C

// Droplet
group id = J, translation = 0 0 0, shape = sphere, scalexy = 1 0, scalezy = 1 0
material group = J, roughness = 0, lighting = smooth
  colors = J:#00C

// Skewed Cylinder
group id = L, translation = 0 0 0, shape = cylindery, translatexy = -0.5 1 1 -0.5
material group = L, roughness = 0, lighting = both
  colors = L:#00C

// Twisted Cube
group id = M, translation = 0 0 0, shape = box, rotatey = 0 90
material group = M, roughness = 0, lighting = sides
  colors = M:#CC0
Deform
To table of contents▲ Deform works by averaging linked vertices. Deform has three parameters:deform = <count> <strength> <damping>.
- Count is used to increase the number of averaging steps.
- Strength (optional, default 1) determines how strong the deformation is. A negative strength results in a spiked instead of a smoothed look.
- Damping (optional, default 1) determines how the strength should be dampened per step.
With damping (e.g. 0.7) this effect is diminished while allowing enough steps for a very smooth deformation.
This shrinking can be counteracted in two ways:
1) Add resize=model to the model to resize the model to the original bounding box. This works only if the entire model is deformed and shrinks, not just a part.
2) Use a high count (e.g. 100), with strength 0.5 and damping -1. The negative value for damping makes alternate steps shrink and grow the model resulting in it staying roughly the same size.
Experiment with the values to get the best result with the lowest count. High counts can result in slow rendering when used on large models.
Some combinations of values can create a feedback loop resulting in your model becoming extremely jagged even with a positive strength.
Try to reduce the strength if that is the case.
Tryit
// This material is deformed
material lighting = flat, deform = 1
  colors = B:#0C0

// This material is more strongly deformed
material lighting = flat, deform = 4
  colors = C:#00C

// This 'spiked' material is deformed with a negative strength
material lighting = flat, deform = 1 -1
  colors = D:#CC0
Warp
To table of contents▲ Warp uses a noise function to move each vertex.Warp has two parameters, deform = <strength> <frequency>.
Strength is used to increase how much each vector is moved.
Frequency (optional, > 0 and <= 1) determines how fast the noise field changes (lower means slower). Try
it
// Use tile to prevent scatter and warp at the edges
// tile = x z

// This material is warped
material lighting = flat, warp = 1 0.25
  colors = B:#0C0

// This material is strongly warped
material lighting = flat, warp = 2 0.5
  colors = C:#00C

// This material is warped with a high frequency
material lighting = flat, warp = 0.5 1
  colors = D:#CC0
Scatter
To table of contents▲ Scatter moves the x, y and z of each vertex by a maximum of the provided amount.Scatter has one parameter, scatter = <strength>.
Strengths over 0.5 (or even smaller when combining with deform or warp) may result in intersecting faces.
Tryit
// Use tile to prevent scatter and warp at the edges
// tile = x z

// This material is scattered
material lighting = flat, scatter = 0.25
  colors = B:#0C0

// This material is strongly scattered
material lighting = flat, scatter = 0.5
  colors = C:#00C

// This material is deformed and scattered
material lighting = flat, deform = 2, scatter = 0.15
  colors = D:#CC0
Planar definitions
To table of contents▲ Flatten, clamp and skip specify sides of the model or of the material that need to be flattened, clamped or skipped. Aosides specifies sides of the model from which the ambient light is occluded (e.g. a wall or floor). These settings are all done using planar definitions.Planar definitions are best explained by example:
- flatten = -y : flatten the bottom of the model only
- flatten = +y : flatten the top of the model only
- clamp = -z +z : clamp front and back of the model
- clamp = y : clamp all vertices in the y direction
- skip = -x y : skip the -x side of the model and all(!) tops and bottoms of all voxels
- aosides = -y : occlude ambient light from beneath
Flatten and Clamp
To table of contents▲ Flatten and Clamp both fix the vertices to the sides of the model or the material in a certain direction, and work the same for scatter and warp, simply flattening the vertices.In case of deform, which deforms by averaging linked vertices, clamp also breaks the links with vertices on the clamed sides. Where flatten results in simply flattening the side, clamp therefore results in perpendicular edges.
Flatten and clamp can be set on the model in which case the boundaries of the model are used for -x, +x, -y, +y, -z and +z. When flatten and clamp are used on a material the boundaries of the material are used.
See the chapter on planar definitions on how to specify which sides or planes to skip. Try
it
// This material is flattened at the top and bottom
material lighting = flat, deform = 3, flatten = -y +y
  colors = B:#0C0

// This material clamps all vertices in the y direction
material lighting = flat, deform = 3, scatter = 0.2, clamp = y
  colors = D:#CC0
Skip and Hide
To table of contents▲ Skip and hide are both used to NOT render certain planes or sides. This can be used for models which are not seen from certain angles (e.g. from the bottom). Skip and hide can be set on the model in which case the boundaries of the model are used for -x, +x, -y, +y, -z and +z. When skip or hide is used on a material the boundaries of the material are used.The difference between skip and hide is that skipped faces are not created or calculated, whereas hide means the faces are fully calculated just not generated in the final mesh. Hide therefore still influences neighbouring faces and allows for shells where skipp does not.
The difference between skip and hide is sometimes obvious, sometimes subtle, sometimes there is no difference. Use skip when possible (as it is slightly faster to calculate), but try hide if you get unexpected results (usually slightly wrong normals on edges). At runtime the performance is the same.
Use side = double when you want to show the inside of the model when skipping sides.
See the chapter on planar definitions on how to specify which sides or planes to skip.
Tryit
// This material skips the faces for the top and bottom of the model
material lighting = flat, deform = 3, flatten = -y +y, skip = -y +y
  colors = B:#0C0

// This material skips all faces in the y plane
material lighting = flat, deform = 3, scatter = 0.2, skip = y
  colors = D:#CC0
Fade
To table of contents▲ Fade lets the colors for one material blend into each other when different colored voxels are next to each other. Fade is simply added to the material as fade = true. Tryit
// This model fades the voxel colors
size = 3
material lighting = flat, fade = true
  colors = A:#C00 B:#C60  C:#CC0
voxels =
--A --- ---
-AB --B ---
ABC -BC --C
Lights
To table of contents▲ Lights can be baked into the model vertex colors.Combining Smooth Voxel lights with type basic materials (which are not affected by lights in a scene) gives great lighting with best performance.
Four types of light are supported:
- Ambient lights specify only color and optional intensity.
- Directional lights specify color, intensity and direction.
- Point lights specify color, intensity, position and distance.
- At voxel lights for multiple point or area lights, specify the voxel colorid, intensity, distance.
Point light position is specified in voxel coordinates, and scale and rotate with the model.
Point lights can be made visible for debugging or a just for visible lights by adding a size and optional detail. Detail can be 0 to 3 where 0 is an octahedron, and 1, 2 and 3 spheres with 32, 128 and 512 faces respectively, so use the smallest setting to keep faces down.
At voxel lights are shown not at the voxel center, but on the average location of all vertices of the voxel. This means they are not shown for voxels that have not faces because they are completely enclosed or have skip = x y z. If you want to show only lights and not the voxels themselves set the material to opacity = 0.001. At opacity 0.001 or lower faces are calculated, but not rendered.
Lights work per vertex, for point lights this means that their light may look 'blocky' when using few voxels.
Point and at voxel lights can prevent Smooth Voxels from combining faces, resulting in a larger (and thus slower) mesh. If possible use directional lights.
An example using all light types:
Tryit
// An ambient filler light, not too bright
light color = #FFF, intensity = 0.33

// Red, green and blue directional lights
light color = #F00, intensity = 1,   direction =  0  0  1
light color = #0F0, intensity = 0.5, direction =  0  1  0
light color = #00F, intensity = 0.5, direction =  1  0  0

// The yellow point light with limited distance
light color = #FF0, intensity = 0.5, position = 0.0 5 0, distance = 5, size = 2, detail = 2

// The tiny lights at the location of every B voxel
light atvoxel = B, color = #FFF, intensity = 0.5, distance = 1.25, size = 0.2, detail = 1

model
size = 10 10 10
scale = 0.1
origin = -y
rotation = 0 -45 0

// A basic material, which is not affected by the lights in your scene
material type = basic, lighting = smooth, deform = 20
  colors = A:#FFF

// A group of tiny lights, created at the location of scattered transparent voxels
// Opacity <= 0.001 does not generate faces, but unlike skip does calculate the faces so they scatter
group id = tinylights, shape = sphere, position = 0 5 0, scale = 0.7
material type = basic, opacity = 0.001, scatter = 2, group = tinylights
  colors = B:#FFF

voxels
AAAAAAAAAA 5(AAAAAAAAAA) 3(AAAAAAAAAA) AAAAAAAAAA
AAAAAAAAAA 5(ABBBBBBBBA) 3(ABBBBBBBBA) AAAAAAAAAA
AAAAAAAAAA 5(ABBBBBBBBA) 3(ABBBBBBBBA) AAAAAAAAAA
AAAAAAAAAA 5(ABBBBBBBBA) 3(ABBBBBBBBA) AAAAAAAAAA
AAAAAAAAAA 5(ABBBBBBBBA) 3(ABBBBBBBBA) AAAAAAAAAA
AAAAAAAAAA 5(ABBBBBBBBA) 3(ABBBBBBBBA) AAAAAAAAAA
AAAAAAAAAA 5(ABBBBBBBBA) 3(ABBBBBBBB-) AAAAAAAAA-
AAAAAAAAAA 5(ABBBBBBBBA) 3(ABBBBBBBB-) AAAAAAAA--
AAAAAAAAAA 5(ABBBBBBBBA) 3(ABBBBBBBB-) AAAAAAA---
AAAAAAAAAA 5(AAAAAAAAAA) 3(AAAAAA----) AAAAAA----
Baked shadows
To table of contents▲ Standard Smooth Voxel lights do not cast shadows, but by adding castshadow = true to the light it will cast shadows which are baked into the model vertex colors.Combining Smooth Voxel lights and backed shadows with type basic materials (which are not affected by lights in a scene) gives great lighting with best performance.
Baked shadows per light type:
- Ambient lights (no direction, position, or atvoxel) do not cast baked shadows.
- Directional lights can cast shadows.
- Point lights can cast shadows.
- At voxel lights used as area lights cast nicer shadows, but can be very slow!.
You can add receiveshadow = false to a material to stop it from receiving shadows.
Note that shadowside on a material is meant for real lights, not baked lights and shadows.
At voxel lights create one light per voxel. Reduce the light intensity to compensate.
Shadows are stored in the vertex colors, which may look blocky. Using larger models and textures reduces and hides this effect.
An example using baked shadows:
Tryit
model
size = 49 49 49 // Larger models like this work best for baked shadows
scale = 0.017
origin = -y
ao = #000 15 0.5 // Don't forget ambient occlusion for enhanced realism

// Ambient light
light color = #FFF, intensity = 0.75

// Small area light for diffuse shadows
light color = #FFF, atvoxel = L, castshadow = true, intensity = 0.06
group id = Light, position = -75 36 10
material group = Light, type = basic, lights = false, castshadow = false, hide = x y z, colors = L(246):#FFF

// Yellow floor, walls, ceiling, pillars
material type = basic, colors = A(6):#FF0

// Green back side with portal
material type = basic, lighting = both, deform = 5, clamp = +z, colors = B(226):#0F0
material type = basic, lighting = both, deform = 5, clamp =  y, colors = C(90):#0F0

// The red sphere casts a shadow by default
group id = SphereRed, shape = sphere, translation = 0 0 0
material group = SphereRed, type = basic, lighting = smooth, colors = D(216):#F00

// The blue sphere neither casts nor receives shadows
group id = SphereBLue, shape = sphere, translation = 0 0 0
material group = SphereBLue, type = basic, lighting = smooth, castshadow = false, receiveshadow = false, colors = E(175):#00F
Ambient Occlusion
To table of contents▲ Ambient Occlusion is calculated by shooting rays out of each vertex to determine the distance to other parts of the model. When other parts are near, the vertex is darkened because the ambient light will be more occluded by the nearby geometry. This can a slow process on large models but greatly improves the realism of your models in some cases providing nice fading shadows.Ambient Occlusion, ao, has three parameters, ao = <color> <maxDistance> <intensity>.
The default color is black, but you can get different effects using other colors. Higher maxDistance (in voxels, default 1) takes further away parts into account. A higher intensity (default 1) makes the ambient occlusion stronger, i.e. the occluded parts darker. A negative strength makes the occlude parts lighter.
Ambient Occlusion Sides, aosides, is used to specify which sides occlude ambient light. See the chapter on planar definitions on how to specify which sides occlude ambient light.
Ambient Occlusion Samples, aosamples, specifies the number of samples (light rays) used per vertex. The default is 50 samples which is low quality but gives better performance.
The default for ao can be set on the model (before the materials) and/or can be overridden per material. Aosides and aosamples can only be set on the model. Try
it
model
size = 16 8 16
scale = 0.05
origin = -y
ao = #000 5 1 // Default AO in the model

// More samples gives a smoother look (default 50, minimum 8)
aosamples = 200

// When an object is on the floor / wall, add an extra occlusion plane there
aosides = -y

// Red: Subtle effect because of the larger distance (5, from the model)
material type = standard, colors = A:#F00

// Green: Harsh because of the distance 1, so only neighbouring voxels are taken into account
material type = standard, ao = #000 1, colors = B:#0F0

// Blue: Quick ambient occlusion is faster but does not take deformed / warped / scattered faces into account
material type = standard, deform = 0, quickao = #000 0.75, colors = C:#00F

// Yellow: Colored ambient occlusion and a sharper angle (25 instead of the default 70 degrees)
material type = standard, ao = #F0F 3 2 25, colors = D:#FF0
Ambient Occlusion can be slow. Higher maximum distances and larger models can sometimes be very slow.
Ambient Occlusion with a negative intensity can result in the RGB values going outside of their normal range.
In Three.js / A-Frame this works well (even a white surface can have a brighter spot) but does not work in PlayCanvas.
This behavior may change in future versions of those frameworks.
Textures
To table of contents▲ Texture can really improve the look and feel of your object by adding details much smaller than the voxels themselves. However, you cannot define exactly which part of the texture goes where, so you can't texture complex models as you could in for instance Blender. Especially since textures wrap around voxels before they are smoothed, the results may vary and require quite some compromises. Textures are great however to create for instance repeating surfaces (planks, rivets, etc.) or small, specific details, like a painting in a frame or an image on a monitor.Textures can be wrapped around the object or around the voxels. To use a texture you first need to convert an image to Base64:
- Create a square image with a size that is a power of two
- For normal maps, use tooling to convert the image, e.g. NormalMap Online
- Optimize the image so it is as small as possible, e.g. using TinyPng
- Use the 'Add Image' menu item from the Smooth Voxel Playground to add the Base64 image string
Preferably use power of two texture sizes, i.e. typically 64x64, 128x128, 256x256 or 512x512, but non square (e.g. 512x2048) is also possible.
Textures need to be predefined outside of a material using the Base64 string (inclusing mime type):
texture id=<textureid>, size = <width> <height>,image = <base64imagedata>
Once defined, the texture can be used in one or more materials as texture map, normal map, roughness map, metalness map, etc. (typically different textures for each):
The size and boderoffset properties are used to reduce texture bleeding (i.e. when a texture wraps around and is shown as a thin line in the wrong color on the other side).
Smooth voxels reduces the borders default by half a pixel to prevent bleeding, but this may not be enough for high resolution textures.
Increasing the specified borderoffset to 1 or higher will make the offset from the border bigger, thus reducing the bleeding.
Add map = <textureid> to add a texture map to a material.
Add normalmap = <textureid> to add a texture as normal map to a material.
Add transparent = true to the material when using a transparent texture otherwise you won't be able to see through the texture.
Adding alphatest = <float:distance> to a material helps when your texture is opaque with clear holes in it. The material will not be rendered if the opacity is lower than this value.
Transparent materials will hide other transparent textures behind it even when fully transparent.
This will for instance make a model with a double sided transparent wire fence material like the other side is missing when looking through the gaps at the front side.
Using alphatest will often solve this problem at the cost of smooth alpha transitions.
By default the texture will cover the model on all sides, but the texture for a material can be transformed to stretch or rotate, by specifying width, height and offset in voxels:
maptransform = <width> <height> <xoffset> <yoffset> <rotation>.
The example below uses a map for the sides of the can and a normal map for the pull tap on top: Try
it
// The side of the can
texture id = can, image = data:image/png;base64,iVBORw0KGgoAAAANSUhEUgAAAEAAAABACAMAAACdt4HsAAAC/VBMVEVwrUf///98AAB1AAD9AADYAADdAACoAACaAAC1AACUAADGAADAAACxAACjAADOAADIAAC6AAC3AACuAAChAADDAAC9AACNAACMAACqAACcAACTAACEAACFAAD/AADLAAD4AADsAADTAADyAADvAAD2AAD0AAD6AADUAADQAADgAADiAADkAADoAADlAADpAAD8AABtqUVFaixxq0ZDaCv7/Prw19dkmj+YAQD++vr0+PGmzIz8/Pz4+/bi6tv/09PS28x2sE9yqUV1pkRrpkR0nEB/m0B5hjaRhTZSfjNIbi54bCyZayyJOximAAD/8PDv9ev83NzC3LCfwIqPv2+Kumq9XFx6s1RxpENpo0J4oUJhlD5dkDpaizh5gDRMdTBJcS6daCqBXyeCVyR2TCOMMBT9ERHiFgmUCwXwCAX+9fX77Ozy5+bp8uL8zMzW58rI08DL4bz7tbXfr6/9qKi21KCt0JbTkZH9hISOpYDLeXnHbm6DpWx0kGKAtltohlVzoEF9lz5ylz6RgDRTczRNdzF5aCuEZyr7KiqoZSmwWyV3UiKnSx+5Qx+nHh59RBx6PhmvPRnHOxi1OBfPLxO7KRGKIw6eDQ3MGQqCFQmTEwjhCAjoCAfLDQWcBwWBCgSLCATTBwPmBgKIAgHfAADNAAD68vLo7OXz4OD12tru4tfny8vL1cXQ5MP8vLzkvLzjt7e+y7bXpKTFq6LZoKCvy5ylt5ncmJicsI+WrIfzh4fjhYXMhYWaxX3dkX3afX2PsHj8eHiVwnaKqnWFnXXmdHTNcXHCeW3vbW3+aGiOfWbFZmbsZGTgXV13gFeUjlX+U1NxnVJkglBjhE3McU3qSkraSUlbe0ZupET6PT3oPT12kTyGUDyHkDtXhjeZNzf0MzOsMzNcdzFpdjB+dTCpKiq/IyO4UiKkUiKjUiJQTSDsICD8Hh5gRh2IRR3SHBxZQBqXPBmxGBh6ORdrOBdsLReyNhbXLxOTLRJ7KhGuGgvVEQfUEQe0DwavBwPsCoPMAAAEB0lEQVRYw6XXVZTTQBgF4DvI1ou7VKFAsQq7XRZnF1vB3d3d3d3d3d3d3d3d3d05TAJtEprwMt9Dk9P8dzIZSU8RnxHiMUIGRkjFCFpGSMsIRkZIwwgGRkjKCCkZIQUjJGaERIxgVTZz4tgRT56OGDtxplUZEsqbOz6mLwL6xoyfq1CIEDlT6hbFP4rWnSJbimzBvsd4IMMT80OmGNmDjKwGBdVGHmkXkihEUo0c/5hXF4oi8pKlceosknpYpOb1h4LKhVGOkBbptVkkAdglLEr5XuXylylfnpC8z1JnkSRgkxgKeRXyEyovIXm8b0ySBDKLjYNE8fqxDRvG1i/O9aBtPsJzu7/YxRFkEmlaDIIi9aYlT2l1zrh4cPfh01c8qLiScAr1vJdCnIFZ5DEE1ycZs9rM5i6lCafA/hpVUaEA4bS5kdgmZOAQmIuJet9EY3c4GrUifptqV/d0Irx86x4lzOwPIYHgMwL6TEuSiX7TjlAtQsMJdaBU9Qg6iHwvQkclzZH7T0jcwDAEvEpjO9PIcZXWhlfyxb1eRU8WuweWp4cBXcsUODZfZbInCG6ghNCBWScLkmv67TTQ2Wd0JmjEjcQ59x762dtd3XU/OR/nIaNAGIIHG2jpcfVm+tlNndScMWNBenbK24NOwmV3TUQZcgdC4gaKgle4U0S97ty91Ye4x52czJZxSDgdugbuHq0r1h5YIxJFVGblBip3pOtt/W0aXaN+14xrofulvc3psf2HUmFwhUVyS8SYKRASjwF9hIqI4BftcnrLJT7jCRLQfNTLki78EWWkUyQ3iPtako23zrb+G8k3Oe2Co7QPvNCHvgFVA4tEZRYayC24kIfOc+86YXTb8+6qszpedCkYThatrjQr7m0k/OppHIEQHIIONJS/q7ekq3JbwqnkS2Gm69M2faEuccLGovdUQ50QglnAzdUKLx0qYGcZer5Dq8nsv9a0BAKifAuEkHg3diDU2vM1XNxclqPjrlVZ/l5qfBOC+iqbEBK/D4bwOy/P1pJhoCq0DFUnd/IXGg8tAkFUE5MoBJvInbKE07MO30LhjrVGf5owYdywEh6IxcZZRBnYxZruysNteK9/xl0uBBmklbwUYZGYsYx76XjrVIWSWqlSShLIJfacf4Yt3tqRivk5hpySCHJKbOM6UIpuOAXRc5JlkybglJjeqmy3j+6aLsiqMjq1JsQphZB/JU76c7D8j2v0VK0uqBwJZVi/Da4SdPdBU1MZrMG1yCLL9Cs2uh8C+kW/n50umUmuElnlJVqoVzWZNKbB8OENxnydPV+r0psSyRbC9B86fRKNwaBJotcp10DHCHpGSMIIGkZIxggqRkjOCGpGSMcIqRkhPSP2P9/xGf0G+QW7wljDczMAAAAASUVORK5CYII=

// The normal map for the top of the can
texture id = top, image = data:image/png;base64,iVBORw0KGgoAAAANSUhEUgAAAEAAAABACAMAAACdt4HsAAAAAXNSR0IArs4c6QAAAARnQU1BAACxjwv8YQUAAACrUExURYCA/4yl5oytvYzetWvO3mul3oSM/7XOtWvOnLWtvUrOnEqt3mtz5mtS3oxS3oxz5oyE/0pK3mspnK0pnK1K3imtnGuE5q1r3rWMvUqM3kpr3ilr3uaMtSlrnM5rnCmM3imMnLWM5kopnIwpnISE/0rO3q1KnEpKnM5KnClKnM5r3oyE1rWt5mtKnEprnK1rnIxrnGuMnEqMnEqtnIxKnIwp3msp3mutnIyclDvh9SwAAAAJcEhZcwAADsMAAA7DAcdvqGQAAAJiSURBVFhH7ZZdd9owDIaJwSZp7HwAC7H5GNsyaJfRrisw/v8vm2T75ACFYHPR0wueC0c26EUOkuzOnTufnSAgXU2PMrvkQ9DvkiAAT8ZoLwypXXaFRf3Amhr6EPtFEUX6wUWSJKk241g/HMmMfz5AgeEow8mXQq+5MS5xzHM96YxGOEofgRQFlPUHhTEMEy+BKQwzbiYwncPw1VtgYWwEBWY+AtkU3tuBgNbzF2g8Mr0jYzsyBwHZ/PPRNxj8BDCCJndMVh3syIE5ph+LQwoV1Y8wi7lnBBg0lAAlhJiiKPwiKDF1juATa7hRQgT8+w/LEDYkpf3IDRRQqrKMIR5PAawmKcGXMRTAmbIfuWEFoC2FPwsjcFMEUVBVNNYCyieTTT1LmU3xDSwKFPAqRlOOIDBPq4rPdARe7cCUD2xhvEzESmkBr2puBKokEaKqShDwqmYQgBZSPJhzpdvtQ2n5lYKpZzhTDLjgKcAfzWnQwJ9OFtoRYv7Lmha1SMzx4ALP6yg7DoE/FTEdOQbB8whawPhQga+gxVNHBZ6XuoVADug5IFYCH6DgsgtV/zZGuhwmaZpyMVjbIyau3/WZ9/DnsvmZNIFuMhDNCdWRL9dDUBzS7hLSIQT1x/TTs8jXFnWLfGl51YWLQFuUykXg70kOHjLBZnuF4u3yHvhz5JAI8evjhW/xVWlTpJ24Pp+yukSs3UrxVi/PKPBVrU9ZB1hMl6dBcLEmrv4ADevN1t4wAS526/r46noNRkNSbzbb7Waz263XNekSv6suSvTCHvm33+8JeOOt+wYYC5DbnO98GJ3Of95VLFrzPHFRAAAAAElFTkSuQmCC

model
size = 10 12 10
shape = cylindery
scale = 0.05 0.075 0.05
rotation = 45 -50 0
origin = -y +z

// Position the texture and normal map
material lighting = smooth, roughness = 0.2, metalness = 1, map = can, maptransform = 10 10 0 -0.1
  colors = A:#FFF
material lighting = flat,   roughness = 0.2, metalness = 1, normalmap = top, maptransform = 8 8 -0.125 -0.1
  colors = B:#DEF
material lighting = smooth, roughness = 0.2, metalness = 1, deform = 4
  colors = C:#DEF
material lighting = flat,   roughness = 0.2, metalness = 1
  colors = D:#DEF

voxels
CCCCCCCCCC AAAAAAAAAA 8(AAAAAAAAAA) AAAAAAAAAA CCCCCCCCCC
C--------C ADDDDDDDDA 8(AAAAAAAAAA) ABBBBBBBBA C--------C
C--------C ADDDDDDDDA 8(AAAAAAAAAA) ABBBBBBBBA C--------C
C--------C ADDDDDDDDA 8(AAAAAAAAAA) ABBBBBBBBA C--------C
C--------C ADDDDDDDDA 8(AAAAAAAAAA) ABBBBBBBBA C--------C
C--------C ADDDDDDDDA 8(AAAAAAAAAA) ABBBBBBBBA C--------C
C--------C ADDDDDDDDA 8(AAAAAAAAAA) ABBBBBBBBA C--------C
C--------C ADDDDDDDDA 8(AAAAAAAAAA) ABBBBBBBBA C--------C
C--------C ADDDDDDDDA 8(AAAAAAAAAA) ABBBBBBBBA C--------C
CCCCCCCCCC AAAAAAAAAA 8(AAAAAAAAAA) AAAAAAAAAA CCCCCCCCCC
Next to map and normalmap, many other map types are supported like rougnessmap, metalnessmap, emissvemap, matcap etc.
Check the Smoot Voxel Cheatsheet for more information.
Some map types are multiplied by certain properties, e.g. emissivemap vs. emissiveintensity or do not use all RGB channels of the texture. Check the Cheatsheet for more information.
Note that metalness map and roughness map textures are typically greyscale images.
The values use will be 0 for black to 1 for white.
However, when using both together in one material, one texture must be supplied.
The metalness values will be taken from the B channel.
The roughness values will be taken from the G channel.
Note that glTF export will only work correctly with metalness and roughness combined in one texture!
However, when using both together in one material, one texture must be supplied.
The metalness values will be taken from the B channel.
The roughness values will be taken from the G channel.
Note that glTF export will only work correctly with metalness and roughness combined in one texture!
Cube Textures
To table of contents▲ Next to using the same image on all sides of the model / voxels it is also possible to use cube textures. Cube textures cover the model at all sides and are especially suited for skyboxes and planets (combined with shape = sphere).Cube textures are used to cover the entire model and maptransform is therefore ignored.
Cube textures should be twice as wide as they are high, preferably using power of two texture sizes, i.e. typically 512x256, 1024x512 or 2048x1024. Cube textures must have the layout as shown this image:

Equirectangular planet and skybox textures are much easier to find online than cube maps in this arrangement.
You can easily use them by importing them in the Playground via the 'Add Panorama as Cube Texture' menu item.
Cube textures are used the same as normal textures and also need to be predefined outside of a material:
You can easily use them by importing them in the Playground via the 'Add Panorama as Cube Texture' menu item.
texture id = <textureid>, cube = true,
        image = data:image/<type>;base64,<base64imagedata>
Reflection & Refraction
To table of contents▲ Reflection and refraction can add a lot of realism to your models. Chrome or glass can look quite convincing with the right settings.
Smooth Voxel uses A-Frame and Three.js.
The behaviour for reflection and refraction for different material types may vary in other platforms.
Reflection
Reflection works out of the box for the standard material as it takes over the environment map from the playground or your scene. To make standard material reflect, simply use a low roughness (near 0) and set high metalness (near 1).
The following standard material resembles chrome:
material type = standard, lighting = smooth, roughness = 0, metalness = 1,
  colors = A:#DDD
Reflection also works for basic and phong material types, however they do not automatically pick up the enviroment map from the playground or your scene. For basic and phong materials you have to explicitly set the envmap.
In the Playground, simply select 'Add Environment texture' to add the current environment
as a texture to use as a envmap = env.
You can also choose 'Add Environment variable' which will use the current selected environment so you can easily see your model under different lighting. However this only works in the playground!
The following is shiny reflective blue ceramic:You can also choose 'Add Environment variable' which will use the current selected environment so you can easily see your model under different lighting. However this only works in the playground!
// Texture loaded in the Playground with 'Add Environment'
texture id = env, image = %ENVIRONMENT%

material type = phong, lighting = both, shininess = 10000, reflectivity = 0.1, envmap = env
  colors = A:#579
Refraction
Refraction is what makes glass look like glass and water like water. Simply setting the opacity of a material will get you the transparency, but you material would look more like very thin plastic than like glass.
Refraction works mostly the same as reflection, but uses different settings. The easiest way to try these out is by adding one of the material code snippets in the playground.
The following is a typical wine bottle glass material:
// Texture loaded in the Playground with 'Add Environment'
texture id = env, image = data:image/jpeg;base64,/9j/4AAQSkZJRgABAQEAYABgAAD/4QBoRXhpZgAATU0AKgAAAA...

material type = phong, lighting = smooth, roughness = 0, metalness = 1, refractionmap = env
  colors = A:#080
Refraction & Reflection
If you use the wine bottle glass material above, you will notice that it looks like glass, but it misses an important property. Real glass not only refracts the light, but also reflects it. And even though the material above shows the specular reflections of the lights in the scene, it does not reflect the scene itself.
Smooth Voxels supports a better glass material out of the box with the physical material type.
However, the alternative described here might be required for some platforms (e.g. the physical material type does not work on Oculus Go) or performance optimization.
To create realistic glass we need to combine refraction with reflection, but this is not (yet) possible with only one material.
The solution is to overlay an reflective material over a refractive material by means of adding a shell.
The following is a more realistic wine bottle glass material, with reflection:
// Texture loaded in the Playground with 'Add Environment'
texture id = env, image = data:image/jpeg;base64,/9j/4AAQSkZJRgABAQEAYABgAAD/4QBoRXhpZgAATU0AKgAAAA...

material type = phong, lighting = smooth, roughness = 0, metalness = 1, refractionmap = env, shell = B 0.01
  colors = A:#080
material type = phong, lighting = smooth, roughness = 0, metalness = 1, opacity = 0.2, reflectionmap = env
  colors = B:#080
See the Shell chapter for more information on shells.
The example below shows reflection, refraction and combined refraction & reflection:
Tryit
texture id = env, image = %ENVIRONMENT%

model
size     = 15
scale    = 0.05
origin   = -y

// The red material is reflective.
// Standard material uses the scene environment map, so no envmap needed
// But the Standard material does NOT support refraction!
material type = standard, lighting = both, deform = 10
         roughness = 0, metalness = 1
  colors = A:#F00

// The green material is only refractive which looks less realistic
// Refraction works best with phong and basic materials
// But Phong and Basic materials need an explicit envmap!
material type = basic, lighting = both, deform = 10
         envmap = env, refractionratio = 0.95, reflectivity = 0.8
  colors = B:#0F0

// The blue material is refractive with a reflective shell (so twice as many faces!)
material type = basic, lighting = both, deform = 10
         envmap = env
         refractionratio = 0.95, shell = Reflection 0.01, reflectivity = 0.7
  colors = C:#00F

// The reflective shell for the blue material
material type = basic, lighting = both, opacity = 0.2,
         reflectivity = 1, envmap = env
  colors = Reflection:#FFF

// The white, Physical material produces very realistic glass.
// But uses an extra render pass to show the other objects through it!
material type = physical, lighting = both, deform = 10
         roughness = 0.1, metalness = 0.2,
         thickness = 0.5, transmission = 1, ior = 0.8
  colors = D:#FFF
Shell
To table of contents▲ Shell allows for the adding of one or more shells around the model or on certain materials. A shell can be a wireframe cage or a transparent shield, or, by showing only the back side of the shell it becomes an cartoon style outline. Shells can be defined on the model as well as on a material, and are themselves created from defined materials. A shell is formed by repeating the faces of the model but pushing them out and using a different material. Since a shell is modeled from the faces of the model, its material will ignore many of the properties. For example:- lighting only supports smooth and flat lighting, not both.
- deform, warp and scatter will be the same as for the model.
- skip will be the same as for the model.
- color and fade of the voxels are ignored.
- ambient occlusion is not performed on shells.
Smooth Voxel models combines faces to get smaller meshes with better performance.
However, this simplified model is also used for the shell, but when pushing out faces using their normals, gaps may appear in the shell.
Often this is not noticible, but when it does happen you can prevent gaps by adding simplify = false to the model or material.
Be aware, shells double your face count and model size.
Especially transparent textured shells can give a significant performance degradation when using the model.
Small outlines using the basic or normal material type however, will likely not have a big impact.
Tryit
// Black outline shell material
material type = basic, side = back
  colors = Black:#000

// Wireframe shell material
material wireframe = true
  colors = Wire:#A50

// Textured shell material
material type = basic, map = squares, maptransform = 1 1, transparent = true, side = double, alphatest = 0.2
  colors = Squares:#008

// The orange material has a wireframe overlay with a black outline
material lighting = flat, deform = 5, scatter = 0.25
  shell = Wire 0.01 Black 0.5
  colors = A:#F80

// The blue material has a textured shell
material type = toon, lighting = smooth, deform = 5
  shell = Squares 0.5
  colors = B:#44F

voxels =
6(AAAA--BBBB)
6(AAAA--BBBB)
6(AAAA--BBBB)
6(AAAA--BBBB)
Shaders
To table of contents▲ To see how vertex data can be used in a shader, see the shader example on smoothvoxels-examples.glitch.me.In custom shaders it is often useful to add extra data to each vertex to determine how the shader should handle this vertex / face. This can be done by adding a data attribute to the model and materials.
The model determines the names of the attributes that are passed to the shader and the default value(s) of the attributes in case they are not set on a material:
data = [ <attributename> <float:default> [<float:default>] [<float:default>] [<float:default>] ]+The number of default values determines the data type of the attributes for the shader:
- 1 float becomes glsl type float
- 2 floats becomes glsl type vec2
- 3 floats becomes glsl type vec3
- 4 floats becomes glsl type vec4
Since Smooth Voxels uses Color Managent by default, you need to add this at the end of you fragment shader to handle the colors correctly: #include <encodings_fragment>
Each voxel has its own vertices in the final geometry. When two voxels touch and have different vertex data that changes the behavior of the vertex shader, these voxels may no longer touch in you scene.
Note that even though these extra attributes are exported in .gltf and .glb and generated code, not all applications are able to handle them.
SmoothVoxel models are by default simplified, i.e. faces are combined to reduce the model memory usage and increase performance.
When using vertex shaders it is often unwanted that the model is simplified,
It is usually better to have all vertices separate so they can individually be displaced for a smoother effect.
To stop SmoothVoxels from simplifying the model or a certain material set simplify on the model and/or material:
simplify = { true | false }
Defines
To table of contents▲ Often you will have the same material for different parts of your model, but with different modifiers, e.g. clamp = x or clamp = z. When you then want to change that material you have to change multiple instances of it. In that case it is much easier to use definesFor instance, the following example:
model
size     = 11 3 3
scale    = 0.1
origin   = -y

material lighting = both, roughness = 0, metalness = 1, deform = 2, clamp = x
  colors = X:#C00
material lighting = both, roughness = 0, metalness = 1, deform = 2, clamp = y
  colors = Y:#0C0
material lighting = both, roughness = 0, metalness = 1, deform = 2, clamp = z
  colors = Z:#00C

voxels
9(XXX-YYY-ZZZ)
Is easier to read, and easier to change, with defines:
model
size     = 11 3 3
scale    = 0.1
origin   = -y

define chrome lighting = both, roughness = 0, metalness = 1, deform = 2

material chrome, clamp = x, colors = X:#C00
material chrome, clamp = y, colors = Y:#0C0
material chrome, clamp = z, colors = Z:#00C

voxels
9(XXX-YYY-ZZZ)
Defines are replaced globally. I.e. even when one is used before it is defined it will work.
However, the convention is to place defines before their use, typically above the materials.
For very log defines (e.g. many material settings in one define) you can use a line continuation underscore '_'
to break up the define in multiple lines to make it easier to read.
Using a keyword as define may result in errors about things that don't seem to appear in you model.
So, getting strange errors? Check your defines! (Note: defines are case sensitive, keywords are not!)
So, getting strange errors? Check your defines! (Note: defines are case sensitive, keywords are not!)
Groups
To table of contents▲ Groups allow you to create multiple separate models which can be individually moved, scaled and rotated and recolored. This allows you to create models parts with different voxel sizes and rotated voxels. It is also possible to set the shape for groups, for instance allowing you to create perfect round wheels for a car.The following example shows a combination of define and groups to create a complex model: Try
it
model
size = 10 2 10
scale = 0.06
position =  0 0.25 0
ao = #000 5 1

// Define the translation for each subsequent ring
define moveit position = 2.8 0 2.8, rotation = 45 0 90, scale = 0.8

// These are the one and only ring and inner ring which are cloned over and over
group id = Ring, shape = cylindery, scale = 0.8, prefab = true
material type = standard, lighting = both, roughness = 0, group = Ring
  colors = A:#800
material type = standard, lighting = both, roughness = 1, group = Ring
  colors = B:#F00

// Create the 7 actual rings, moving and recoloring them as we go
group id = Ring1,  clone = Ring,                        recolor = A:#F00 B:#800, rotation = -70 0 30 // Recenter
group id = Ring2,  clone = Ring, group = Ring1, moveit, recolor = A:#F80 B:#840
group id = Ring3,  clone = Ring, group = Ring2, moveit, recolor = A:#FF0 B:#880
group id = Ring4,  clone = Ring, group = Ring3, moveit, recolor = A:#0F0 B:#080
group id = Ring5,  clone = Ring, group = Ring4, moveit, recolor = A:#08F B:#048
group id = Ring6,  clone = Ring, group = Ring5, moveit, recolor = A:#00F B:#008
group id = Ring7,  clone = Ring, group = Ring6, moveit, recolor = A:#80F B:#408

voxels
  2(BBBBBBBBBB)
  2(BAAAAAAAAB)
6(2(BA------AB))
  2(BAAAAAAAAB)
  2(BBBBBBBBBB)
Model syntax
To table of contents▲
This model syntax does NOT show all options, see the Smooth Voxel Cheatsheet for all options!
Smooth Voxel models are text based and describe the materials, general transformations and of course the voxels themselves.The syntax of a model is consists of a number of larger blocks, usually, but not necessarily, in the order shown below:
      [ <texture> ]     // Zero, one or multiple
      [ <light> ]       // Zero, one or multiple
      <model>           // One
      [ <group> ]       // Zero, one or multiple
      <material>        // One or multiple
      <voxel-matrix>    // One
Per blok (except for the voxels) multiple settings of the form <name> = <value> can be added.
Each setting can be defined on a separate line, or multiple on one line, separated by comma's.
See the Smooth Voxel Cheatsheet for all options per block type.
Comments
Only single line comments are allowed, they start with // and can be on separate lines or at the end of a line.
Defines
Defines, as their name suggests define a reusable definition, which can subsequently be used (i.e. a string replace of 'name' by 'definition' the entire model)
define <name> <definition>
Planar definitions
Planar definitions are used to specify which planes or sides are used for that feature:
<planar-definition> = [-x] [x] [+x] [-y] [y] [+y] [-z] [z] [+z]Colors
Colors must use hexadecimal notation with 3 (#RGB) or 6 (#RRGGBB) hexadecimal digits and must start with a # character:
<color> = { #[0-9a-fA-F]{3} | #[0-9a-fA-F]{6} }
Every material must define one or more colors with IDs:
<material-colors> = { <color-id>:<color> }+     // E.g. A:#123 or Ab:#0088FF
<color-id> = [A-Z][a-z]*
Each color must have an Id consisting of one uppercase letter, optionally followed by one or more lower case letters [A-Z][a-z]*.
These color Id's are used in the Voxel matrix where empty voxels are shown by means of '-'.
When loading MagicaVoxel models, the palette index of each color is preserved:
<color-id>(<palette-index>) = <color> // E.g. A(1):#123 or Ab(123):#0088FFThe syntax allows for newlines between attributes for the model or materials, but values must always appear behind the '<name> ='' on the same line. This is normally not a problem since most values are relatively short. The material colors form the exception, since a material can have many colors. In that case the line continuation character _ can be used to allow for line breaks between colors as in this example:
model
size = 16 1 1
scale = 0.1
material lighting = flat
colors = A:#000000 B:#111111 C:#222222 D:#333333 _
         E:#444444 F:#555555 G:#666666 H:#777777 _
         I:#888888 J:#999999 K:#AAAAAA L:#BBBBBB _
         M:#CCCCCC N:#DDDDDD O:#EEEEEE P:#FFFFFF
voxels
ABCDEFGHIJKLMNOP
Voxel matrix
The voxel matrix consists of one color Id for each voxel or '-' for a missing voxel.
The voxel matrix is ordered x, y then z.
All whitespace in the voxel matrix is ignored allowing for a more human readable format.
The Smooth Voxels component renders internal spaces (without voxels) as well, resulting in extra, possibly never seen, faces.
This not only creates larger models, but also will cost performance while viewing these models.
Always fill models so they are not hollow for best performance. Preferably fill them with the same material and color as the outside.
Voxel matrix compression
To table of contents▲ Compressed voxel matrices can reduce the size of large voxel models to a few percent of the original model.The voxel matrix can be compressed using recursive run length encoding:
An integer count indicates the next color or empty voxel must be repeated the indicated number of times.
Groups can be created by means of a count followed by a group between ( and ).
The following definitions are all valid and all create the same red 'T' character, following the same compression steps Smooth Voxels does internally: Try
it
// Human readable form, from left to right showing the vertical layers
size = 3 4 2
material lighting = flat, colors = A:#F00
voxels =
-A- -A- -A- AAA
-A- -A- -A- AAA

// No whitespace
size = 3 4 2
material lighting = flat, colors = A:#F00
voxels = -A--A--A-AAA-A--A--A-AAA

// Simple run-length encoding
size = 3 4 2
material lighting = flat, colors = A:#F00
voxels = -A2-A2-A-3A-A2-A2-A-3A

// Run-length encoded groups
// (Note: groups must end with a voxelid, never a count!)
size = 3 4 2
material lighting = flat, colors = A:#F00
voxels = -2(A2-)A-3A-2(A2-)A-3A

// Recursive run-length encoded groups
size = 3 4 2
material lighting = flat, colors = A:#F00
voxels = 2(-2(A2-)A-3A)

// Multi character color id's
size = 3 4 2
material lighting = flat, colors = Red:#F00
voxels = 2(-2(Red2-)Red-3Red)
Even though Smooth Voxels does a very good job of compressing the voxel matrix, its algorithm does not always find the absolute optimum. The red T in the example above for instance, is compressed by Smooth Voxels to:
2(-2(A2-)A-3A)
but could be compressed even more to:
2(3(-A-)3A).
Compression efficiency
Compared for instance to Magicavoxel files, uncompressed Smooth Voxels models are often of similar or even a few times larger in size. The reason for this is that the Smooth Voxels syntax does not only store the voxels, but also the empty spaces, creating relatively big files for large sparse models. However, the equivalent compressed Smooth Voxels models are typically much smaller down to often only several percent. Especially for filled models (without internal empty spaces) the models are usually smaller even uncompressed and much smaller compressed.
Below the compression comparison between Magicavoxel and Smooth Voxels using the Teapot.vox model and a flood filled version of that same model:
| Model | Magicavoxel | SVOX | SVOX compressed | Teapot.vox | 143,083 bytes | 622,896 bytes (435%) | 36,619 bytes (25.6%) |
|---|---|---|---|
| TeapotFilled.vox | 888,989 bytes | 622,896 bytes (70,1%) | 22,516 bytes (2,5%) |
Sample Teapot model converted by ephtracy from the Utah Teapot.
https://github.com/ephtracy/voxel-model/blob/master/vox/scan/teapot.vox
https://github.com/ephtracy/voxel-model/blob/master/vox/scan/teapot.vox
Getting Started with the SVOX Component
To table of contents▲ Getting started with Smooth Voxels in your own A-Frame project is easy.Just follow the example below. You can copy the code directly to JSFiddle.net or edit it locally (but you need a local web server!)
This example shows a runtime generated Smooth Voxels model: Try
it
Perhaps unexpectedly, workers slow the generation down. However, they do offload most of the work from the main thread keeping the page responsive.
Getting Started without the SVOX Component
To table of contents▲ If you don't want to include the Smooth Voxels library, you've got two other options; You can just export the model from the Smooth Voxel Playground as a .gltf file. and use that directly. For more information see the A-Frame documentation.Alternatively, you can also export your model directly into a javascript A-Frame component that you can use directly as in the example below, which uses the same model as the previous example: Try
it
Note that, with or without the Smooth Voxels Component, when using metalness on the standard material, you need to provide an environment map that can be reflected. Adding the below code at the end of the html file between the </body> and the </html> tag will provide a simple environment map:
Getting Started on your own SVOX Component
To table of contents▲ Sometimes it is better to create your own A-Frame component instead of the Smooth Voxels A-Frame component. Especially when reusing the same Smooth Voxel model multiple times it may be better to create your own A-Frame component, generate the mesh once and reuse it.The following example shows how to generate a mesh and reuse it many times to create 'infinite' 3D Truchet tiles: Try
it
Getting Started with Procedural Generation
To table of contents▲ Smooth Voxels is one of the easiest ways of getting into procedural 3D model generation.Just go to the smoothvoxels-examples project on glitch.com, include the smoothvoxels.1.2.0.min.js and smoothvoxelworker.js files into your own project and follow the example below.
Below an example in which a planet is generated: Try
it
Smooth Voxels Release Notes
To table of contents▲Smooth Voxels 2.2.0 (January 7, 2024)
In this release the biggest new features are:
- Many more shapes are now possible. Next to the existing box, sphere and cylinder you can now also make shapes like prisms, pyramids, twisted shapes and lathes using the new scale.., rotate.. and translate.. keywords. See the chapter on shapes for more information.
A few minor non-breaking changes are introduced, see below for migration hints if you have existing models.
New model functionality:
- scaleyx, scalezx, scalexy, scalezy, scalexz and scaleyz can now be added to the model or a group to scale in a specific direction to create a trapezoid. Combine them to get a pyramid, or combine with shape to get a cone or droplet shape. Using multiple scaling values combined with a cylinder shape to create a lathe shape
- rotatex, rotatey and rotatez can now be added to the model or a group to twist the model in a specific direction to create for instance a screw or fan..
- translateyx, translatezx, translatexy, translatezy, translatexz and translateyz can now be added to the model or a group to translate the voxels.
- lighting = sides is a new lighting option to give all neighboring voxel sides smooth lighting with hard edges between voxel sides.
- shadowquality can now be added to the model with value low or high (default). Low makes the baked shadows more blocky, but faster to render.
- No new functionality ....
- Automatic face aligning was accidentally removed in 2.1.0, this has been corrected. Face alignment gives a marginally improved model in some symmetric models.
- warp with x, y and z amplitudes also now works correctly when one ore more of the values are 0.
- Removed an error of translation and position beging combined in a group, which sometimes appeared even when no translation were used.
- cylinder-x, cylinder-y and cylinder-z shapes will be deprecated in release 3.0. You should now use cylinderx, cylindery and cylinderz.
- aosides did not properly take the full model bounds into account, resulting for instance in ao as if the model was below the ground when it was not.
| Change | Syntax |
|---|---|
| Shape values cylinder-x, cylinder-y and cylinder-z will be deprecated in release 3.0. |
OLD: shape = cylinder-y NEW: shape = cylindery |
Smooth Voxels 2.1.0 (December 31, 2023)
In this release the biggest new features are:
- Baked shadows!
- Better handling of cube textures and texture bleading
- Automatic conversion in the playground of equirectangular textures to cube textures
- Loading of heightmaps in the playground
- Jsdelivr.net distribution, so no need to host Smooth Voxels yourself anymore.
A few minor non-breaking changes are introduced, see below for migration hints if you have existing models.
New model functionality:
- castshadow can now be added to a directional or positional light to create baked shadows.
- castshadow can be set to false for a material to prevent it from casting baked shadows. This setting is ignored for real lights!
- receiveshadow can be set to false for a material to prevent it from receiving baked shadows. This setting is ignored for real lights!
- shadowside can now be set on a material to define which side of faces cast shadows . This setting only applies to real lights, not to baked shadows!
- hide is new, next to skip. Skip completely skips the faces during calculations, wheareas hide calculates everything, only does not render it in the model.
- translation for groups allows you to move groups relative to their original location instead of the origin.
- id is no longer mandatory in groups, making it easier to create and copy clones.
- borderoffset on the texture specifies the anti texture bleeding border. The default of 0.5 pixel is usually enough but higher may be needed for high resolution textures.
- Show normals displays the model normals instead of the model.
- Add Panorama as Cube Texture adds an equirectangular 360 degree panorama image as a cube texture for Smooth Voxels to use (e.g. as a planet or skybox).
- Load Heightmap from Image loads an image and uses its dark and light areas as valleys and mountains (max 64 levels).
- Load Gradient Heightmap is similar to the previous option but uses a grey scale gradient (max 26 levels).
- .jpeg and .webp can now be used in the Playground.
- jsDelivr.net is the new way to directly link to the Smooth Voxels library, no need for local hosting anymore.
- The worker is now included and does not need to be added as a separate file anymore.
- A-frame updated to version 1.5.0.
- Performance improvements, e.g. in ao up to 25%
- Large textures no longer make the rendering extremely slow.
- Texture bleeding was handled wrong for cube textures. Now texture bleeding occurs much less by default and when it happens can easiliy be reduced by increasing the borderoffset in the tecture definition.
- The name of the model was sometimes not correctly set in logging.
- skip sometimes still influenced other faces, this is no longer the case. Use hide where this is needed.
- normal calculations have been improved around clamped or tiled edges (e.g. normals for cloned straight pipes now lign up)
- fade between material colors (e.g. neighboring red and green voxels) no longer gives an unattractive dark band in the middle when using color management.
- Compression of the model when saving as A-Frame (javascript) now works again.
- Decompress voxels in the playground now aligns the voxels if there there are 2 or three character voxel Id's.
| Change | Syntax |
|---|---|
| jsDelivr.net now serves the Smooth Voxels library, with the worker embedded. |
OLD: host smoothvoxels.js and smoothvoxelsworker.js locally and link to smoothvoxels.js NEW: <script src="https://cdn.jsdelivr.net/gh/SamuelVanEgmond/Smooth-Voxels@v2.1.0/dist/smoothvoxels.min.js"></script> |
| Skip vs hide: Use skip as much as possible for performance, but if your model looks different than before, or you see issues on the edges, change to hide. |
OLD: deform = 2, clamp = y, skip = -y NEW: deform = 2, clamp = y, hide = -y |
| Texture size and borderoffset: Borderoffset is not the correct way to reduce texture bleeding. |
OLD: texture size = 1024 512, ... // With actual texture size of 2048 1024 NEW: texture size = 2048 1024, borderoffset = 0.5, ... |
Smooth Voxels 2.0.0 (June 25, 2023)
This is a major release with breaking changes!
The materials were fully reimplemented, aligning mostly to the Three.js material properties. Color management is now on by default.
This means many new options are available, but for some the syntax has changed. Existing models may render differently or even give errors without changes! (But those changes are simple.)
See the fully new and improved Cheat Sheet for a quick overview of all new features.
See below for migration hints if you have existing models.
New model functionality:
- Materials were fully reimplemented, aligning with (most of) the Three.js material properties, adding blending, dithering, bump maps and displacement maps. This means most Three.js material properties are now available. This came at the cost of some minor syntax changes, so existing models may be affected. See the Three.js documentation for more information.
- physical material type is now also supported, next to basic, lambert, phong, standard, toon and normal. Most options, including clearcoat and two pass refraction are fully supported.
- light position, distance and size are now all in model scale (not group scale!) and rotate and scale with the model and move as the model position is changed.
- atvoxel is a new property for lights, allowing you to place lights at the positions of voxels. Not only makes this the positioning of lights often easier than using position in world units, but it also allows for area lights or whole parts of the model that light up their surroundings according to their shape. Atvoxel even works with warp, scatter, shape and groups (except scale) because the average vertex position for the voxel is used (which might not be the center when not all voxel sides are used). See the new 'SVOX Lit Sign' in the playground for an example.
- data property is now also available on visible lights for use in shaders.
- quickao is a new alternative to ao, which looks at adjacent voxels only, but is much faster to calculate. Works best on right angles.
- groups are a way to make partial models which can be scaled, translated, rotated and cloned, allowing you to create models with angled voxels, voxels of different sizes and other effects previously impossible.
- define can now be used for preprocessor definitions, e.g. to define reusable material settings.
- warp now also allows two dimensional warping (e.g. warp a ribbon only up and down not sideways) next to three dimensional. New syntax <ampl> [<freq>] OR <amplX> <amplY> <amplZ> [<freq>]
- size is a new property for textures, which allows for the prevention of texture bleeding.
- Non manifold smoothed models now look better by recalculating the bad normals from other face normals. Although this looks better for some situations, filling in the missing voxels when possible is always best.
- The cheat sheet has been completely overhauled to more easily find your way in the many many new options.
- Auto completion is now available when editting the models in the playground.
- Code snippets can now be added from the menu, among other things for different materials.
- MagicaVoxel files can now also be saved from the playground!
- Color management is now default on, but can be toggled in the playground. NOTE: You may need to adjust colors in existing models!
- Error handling for the model was improved, giving better feedback on common mistakes.
- Warnings are now also given on non fatal mistakes in the model.
- Scene backgrounds were replaced and now include four different scenes (thanks to blockadelabs.com!).
- VR-Fly mode is now enabled on Quest (2). Use the left and right thumb sticks to move.
- Clipboard save and load was added. In combination with SmoothShare (https://smoothshare.glitch.me) this allows you to share the model to the playground on your Meta Quest or Oculus Go, so you can view it in VR.
Add /?key=YOURKEY to the URL so you don't have to copy the shared key every time. - Usability enhancements like better filename handling, script saving and loading, automatic height calibration in VR, etc..
- Environment variable can now be added via the menu. When a material requires a separate environment map, the environment variable ensure the current environment is always used in the render. This works ONLY in the playgroun.
- Voxel (de)compression is now available via the menu, so you can (de)compress the voxels in the current file. This allows you keep your comments and formatting in place while still having most of the size benefits of compression.
- Model generation (at the bottom of the playground) now allows for more flexibility setting materials and even lights, and includes two documented examples.
- noise in the model generation formula's now uses the more conventional range 0 to 1, instead of -1 to 1.
- model keyword is now mandatory.
- Mesh sizes for models with textures are greatly reduced as vertices are now properly merged when creating the indexed geometry.
- Typed arrays are now used in the (intermediate) svox mesh that is generated. This reduces copying actions and allows the worker to use them as transferables. Unfortunately web workers on Meta Quest are still slower for typical use than not using web workers.
- maptransform implementation was changed. It is functionally the same but you may have to change offsets to get the same result.
- Textured shells now no longer follow the maptransform of the original surface.
- Reloading a MagicaVoxel VOX File in the playground when using visible lights no longer results in extra (unused) materials.
- wireframe is now written for materials when exporting to .svox or as viewer url.
- skip in combination with clamp and deform no longer results in a difference in adjacent faces.
- face handling between transparent, wireframe, back side, and voxels with skipped faces was improved, removing many of the situations in which holes in the model would be shown.
- glTF exports when used on a model with visible Smooth Voxel lights, no longer results in a corrupt .gltf or .glb file.
- aosamples was always available, but was not described in the documentation.
- Render time was reduced by up to 25% in certain models.
- Normal calculation bug fixed around clamped / flat lighting bounderies which produced wrong normals.
- Ambient occlusion minor bug fixed which produced subtly wrong ao values.
- Ambient occlusion is now no longer calculated for materials with 'lights = false'.
- None
| Change | Syntax |
|---|---|
| The model keyword is now mandatory | Add the model keyword when it is not yet present. |
| Color management is now turned on by default |
Either change the setting in the playground, or SVOX.colorManagement = false in code, Or change the colors to align with your original aestethics. |
| Phong and other non-standard materials are no longer derived from the standard syntax and refractionmap and reflectionmap are now both replaced by envmap |
OLD: material type = phong, reflectionmap = env, metalness = 1, roughness = 0 NEW: material type = phong, envmap = env, reflectivity = 1, shininess = 3000 |
| Light color and intensity are now split |
OLD: color = #FFF 0.5 NEW: color = #FFF, intensity = 0.5 |
| Light position, distance and size are now all in model scale. |
Change the position, distance and size to use the model scale. In case the model is rotated or uses position the light is now also rotated or moved. |
| Emissive color and intensity are now split |
OLD: emissive = #FFF 0.5 NEW: emissive = #FFF, emissiveintensity = 0.5 |
| Autoresize was removed and resize now allows for fit, fill or bounds. |
OLD: autoresize = true or resize = model NEW: resize = fit |
| The maptransform implementation has changed and textured shells no longer follow the maptransform of the original surface. | Change the material maptransform offsets and / or add maptransforms to shell materials as needed to get the required result. |
| Refraction is no longer supported by three.js for the standard material. Use basic, lambert, phong or physical material types instead. |
OLD: material type = standard, roughness = 0, metalness = 1, refractionmap = env, refractionratio = 0.5 NEW: material type = phong, shininess = 3000, envmap = env, refractionratio = 0.5 |
| Previous three.js standard shaders gave pleasing results when deliberately overexposing by using negative ao and negative light intensities. The new shaders give trippy color banding instead, which sounds better than it looks. 'Clamp colors' in the playground solves this but looks washed out, change to phong is often a better choice. |
OLD: material type = standard, metalness = 1, ao = 5 -1.5, colors = A:#FC4 NEW: material type = phong, ao = 5 -1.5, colors = A:#741 |
Smooth Voxels 1.2.0 (April 3, 2022)
New model functionality:
- Indexed geometry is now used everywhere, reducing model sizes typically 50% to 75%. When exporting as A-Frame model, the index buffer is compressed, similar to the other buffers, to reduce the A-Frame model size even more.
- lighting = quad is a new alternative to lighting = flat, which makes the quad faces look flat instead of the triangles.
- shell materials now support all four lighting types, flat, quad, smooth and both. NOTE: Since flat lighting is the default for materials, you may need to define lighting = smooth to fix your existing models.
- resize = fit / / fill / bounds can now be defined in the model to resize the model to its original bounds or the bounds to the model.
Resize replaces autoresize which is now deprecated. Autoresize = true now becomes resize = fit.
NOTE: In rare cases this may result in a difference in models created before version 1.2.0 (when resize = bounds was implied). - simplify can now be defined in the model and material to turn off / on the combining of faces to simplify the model.
- reflectionmap can now be defined in the material. It requires an equirectangular panorama texture such as the ones found on polyhaven.com or texturify.com.
- refractionmap can now be defined in the material. It requires an equirectangular panorama texture. Works best with materials of type basic of phong.
- refractionratio can now be defined for the standard material together with the refraction map. It is the index of refraction (IOR) of air (approximately 1) divided by the index of refraction of the material.
- data can now be defined in the model and material to add extra vertex data attributes which can be used in custom shaders.
- Render time was reduced by up to 35% for some models.
- Auto render can now be toggled in the playground settings.
- Background is now shown in the Playground (thanks to texturify.com!). The background can be toggled in the playground settings.
- Environment map can now be toggled in the playground settings.
- Lights can now be toggled in the playground settings.
- A-Frame full scenes can now be exported from the playground. These example scenes exclude compression of the A-Frame model for easier understanding.
- Copy viewer url in the playground now creates a url that opens the Playground fullscreen with your model.
The url also contains your current settings for Day/Night, Background, Environment map, Base, Rotate and Shadow.
Note that most browsers allow links of about 8000 characters so your model will be compressed to allow for maximum model size. You will get a warning if your model is too large (especially when using textures). - Reload MagicaVoxel File now preserves the Smooth Voxel color Id's and uses the same palette indices as in MagicaVoxel.
NOTE: You may need to correct your indices for existing models created using MagicaVoxel! - Extra spaces are now added when exporting uncompressed SVOX files (or reloading MagicaVoxel files) in case there are colorId's of length 2 or 3. This serves to keep an easier to view, aligned, voxel matrix at the cost of a bigger file size.
- Mesh caching is now included in exported A-Frame javascript components.
- Mesh compression using runlength encoding is now included when exporting an A-Frame javascript component.
- The 3D Truchet example was added to show how to reuse Smooth Voxel models in your A-Frame scene.
- The Vertex Data example was added to show how to use data attributes in a custom shader.
- clamp and flatten wrongly worked only on voxel faces which are actually present.
- voxels allows an '=' behind it, but this does not always work (i.e. without spaces around it). Since voxels was the only block that allowed this (unlike light, model, material, etc.) the '=' is now deprecated (although it will still work the same for backwards compatibility).
- Reloading a MagicaVoxel VOX File when using visible lights may result in extra (unused) materials.
Smooth Voxels 1.1.0 (December 19, 2021)
New model functionality:
- shell can now be used to create shells around models or on specific materials. Shells use materials and one or more shells can then be added to the model or a material like a wireframe 'cage' or a cartoon outline. See the Shell chapter for more information and an example.
- transparent can now be set on a material when using a transparent texture.
- alphatest can now be set on a material when using a transparent texture. Using alphatest = 0.5, where needed in combinition with side = double, prevents most of the common issues surrounding transparent textures.
- full screen can now be entered from the Playground using the full screen button at the top right.
- side = back on a material is now also working when exporting to .gltf or .glb in the Playground. Even though the .gltf and .glb format do not support back faces (only front and double), Smooth Voxels now reverses all back faces so they are shown correctly. This is always done, not just when exporting.
- Player height is no longer too high in the documentation 'try out' examples when entering VR mode in the playground.
- Errors are now also logged to the browser console when models are created using worker:true.
Smooth Voxels 1.0.0 (December 11, 2021)
This was the first Smooth Voxels release, containing already much of the functionality described in this document.
About Smooth Voxels and me
To table of contents▲ I started with A-Frame in the spring of 2019 and was immediately hooked.
This was a technology that brought back the times when someone in their attic could create a game in a couple of weeks.
And better yet, it just worked. It worked in the browser, on my Oculus Go, Mobile Phone VR Headset and later on my Quest 2.
But soon I went through my personal hype cycle:
I started with A-Frame in the spring of 2019 and was immediately hooked.
This was a technology that brought back the times when someone in their attic could create a game in a couple of weeks.
And better yet, it just worked. It worked in the browser, on my Oculus Go, Mobile Phone VR Headset and later on my Quest 2.
But soon I went through my personal hype cycle:
😕 This is probably difficult...
😊 Oh wow, this is easy!
😁 Let's go metaverse!
😒 Wait, what? Only primitives?
😖 Well this sucks.
😐 But..., it has so much potential.
Seeing the work others had done I realized I was not alone in this. Some of the 'VR experiences' looked very simple, with only primitives or a few Sketchfab models. This is perhaps to be expected, as most people involved with WebXR are developers, not 3D designers. And since there are many, many more software engineers than 3D artists in the world, this is not likely to change (until AI generated 3D models become mainstream).
Since I had done some 3D programming in the past, I tried out some things, generating terrain and planets (... I know). Yet after all that work I only had a terrain, but what about trees, clouds, rocks, pickup items, etc.?
The first version of the Smooth Voxels A-Frame Component started in the fall of 2019 just to try out some ideas I had about generating 3D models. I worked on it off and on in my spare time, sometimes not for months, sometimes until deep in the night, suffering from extreme feature creep 😏.
Even though I've been active in the field of software development for a long time, it has been many years since I developed professionally myself. And since this is just a hobby project I was more interested in trying to figure stuff out for myself than code hygiene, reusing existing libraries, or figuring out browserify and github (thank you glitch.com!).
That being said, I've always had the idea I should make Smooth Voxels open source so I kept the user documentation up to date with lots of examples, created a playground so non-developers could also use it and I did quite a bit of code cleanup to get it ready to go out into the world.
So, if you want to use the open source library, go to the 'Get me started' chapters!
I hope you enjoy playing around with the Playground and am looking forward to seeing your models turn up in your next (Web)XR game!
How to contact me
If you have a question, want to report a bug, and specially to let me know where I can see your Smooth Voxel Creations(!), feel free to mail me!
Get smoothing those voxels!
Samuel van Egmond